一、环境搭建 1.docker中安装并启动mysql 拉取mysql
启动mysql
sudo docker run -p 3306:3306 --name mysql \
-v /mydata/mysql/log:/var/log/mysql \
-v /mydata/mysql/data:/var/lib/mysql \
-v /mydata/mysql/conf:/etc/mysql \
-e MYSQL_ROOT_PASSWORD=root \
-d mysql:5.7
在/mydata/mysql/conf修改mysql配置
vi /mydata/mysql/conf/my.cnf
[client]
default-character-set=utf8

[mysql]
default-character-set=utf8

[mysqld]
init_connect='SET collation_connection = utf8_unicode_ci' init_connect='SET NAMES utf8' character-set-server=utf8
collation-server=utf8_unicode_ci
skip-character-set-client-handshake
skip-name-resolve
2.docker 安装 redis 1、下载镜像文件
2、创建实例并启动
mkdir -p /mydata/redis/conf
touch /mydata/redis/conf/redis.conf
docker run -p 6379:6379 --name redis -v /mydata/redis/data:/data \ -v /mydata/redis/conf/redis.conf:/etc/redis/redis.conf \ -d redis redis-server /etc/redis/redis.conf
3.maven 3.6.3 注意在idea创建项目时,使用 IDEA 内置的 Spring Initializr 创建 Spring Boot 新项目时,没有 Java 8 的选项了,只剩下了 >= 17 的版本,原来这是因为 Spring Boot 官方不再支持 Spring Boot 的 2.x 版本了,之后全力维护 3.x;而 Spring Boot 3.x 对 JDK 版本的最低要求是 17!
我们可以使用阿里云提供的镜像(https://start.aliyun.com/),
在 IDEA 里更改 Server URL 即可:https://start.aliyun.com/。
4.git配置 1.下载
https://git-sc
2.配置git,右键选择git bash
# 配置git用户名
git config --global user.name "username"
# 配置邮箱
git config --global user.email "username@qq.com"
3、配置 ssh 免密登录
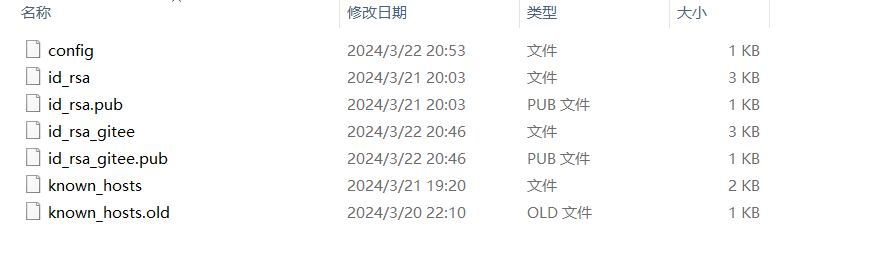
1.我使用Git同时绑定了Github和Gitee
ssh-keygen -t rsa -C "此处填你的github绑定邮箱"
ssh-keygen -t rsa -C "此处填你的gitee绑定邮箱" -f "id_rsa_gitee"
使用命令后
2.将id_rsa.pub和id_rsa_gitee.pub中的ssh公钥复制绑定然后编写config文件(没有可自己创建配置如下信息)
# gitee
Host gitee.com
HostName gitee.com
PreferredAuthentications publickey
IdentityFile ~/.ssh/id_rsa_gitee

# github
Host github.com
HostName github.com
PreferredAuthentications publickey
IdentityFile ~/.ssh/id_rsa
ssh -T git@gitee.com 和 ssh -T git@github.com 测试是否成功连接
5.接口文档 https://easydoc.net/s/78237135/ZUqEdvA4/HqQGp9TI
二、快速开发(逆向工程) 1.使用人人开源搭建后台管理系统 1.从gitee上克隆下来
git clone https://gitee.com/renrenio/renren-fast.git
git clone https://gitee.com/renrenio/renren-fast-vue.git
代码生成器
git clone https://gitee.com/renrenio/renren-generator.git
2.将项目导入到自己的项目中并交给聚合服务管理(讲原来的.git删掉)
<module > gulimall-coupon</module > <module > gulimall-member</module > <module > gulimall-order</module > <module > gulimall-product</module > <module > gulimall-ware</module > <module > renren-fast</module > <module > renren-generator</module >
3.复制db文件夹中sql语句创建gulimall_admin数据库执行
4.修改配置文件中数据库连接信息启动renren-fast因为renren-fast-vue前后端分离,所以要将renren-fast-vue启动才能访问8080端口
5.打开renren-fast-vue
执行
下载项目所依赖的组件并运行
6.修改renren-generator的配置信息想要生成哪个数据库增删改查代码就写哪个
spring: datasource: type: com.alibaba.druid.pool.DruidDataSource driverClassName: com.mysql.cj.jdbc.Driver url: jdbc:mysql://192.168.188.132:3306/gulimall_pms?useUnicode=true&characterEncoding=UTF-8&useSSL=false&serverTimezone=Asia/Shanghai username: root password: 123
修改generator.properties
mainPath=com.atguigu package=com.atguigu.gulimall //修改 moduleName=product author=yinqiangqiang email=1872173046@qq.com //修改表前缀 tablePrefix=pms_
三、分布式组件(Spring Cloud Alibaba和Spring Cloud) 1.前置选择 1.1选择方案: springcloudAlibaba中文文档官网
https://github.com/alibaba/spring-cloud-alibaba/blob/2022.x/README-zh.md
springcloud官网
http://spring.p2hp.com/projects/spring-cloud.html
*SpringCloud Alibaba - Nacos ***:注册中心(服务发现/注册)
*SpringCloud Alibaba - Nacos ***:配置中心(动态配置管理)
*SpringCloud - Ribbon ***:负载均衡
*SpringCloud - Feign ***:声明式HTTP 客户端(调用远程服务)
*SpringCloud Alibaba - Sentinel ***:服务容错(限流、降级、熔断)
*SpringCloud - Gateway ***:API网关(webflux编程模式)
*SpringCloud - Sleuth ***:调用链监控
*SpringCloud Alibaba - Seata ***:原Fescar,即分布式事务解决方案
1.2.版本选择
2022.x 分支对应的是 Spring Cloud 2022 与 Spring Boot 3.0.x,最低支持 JDK 17。
2021.x 分支对应的是 Spring Cloud 2021 与 Spring Boot 2.6.x,最低支持 JDK 1.8。 2020.0 分支对应的是 Spring Cloud 2020 与 Spring Boot 2.4.x,最低支持 JDK 1.8。
2.2.x 分支对应的是 Spring Cloud Hoxton 与 Spring Boot 2.2.x,最低支持 JDK 1.8。
greenwich 分支对应的是 Spring Cloud Greenwich 与 Spring Boot 2.1.x,最低支持 JDK 1.8。
finchley 分支对应的是 Spring Cloud Finchley 与 Spring Boot 2.0.x,最低支持 JDK 1.8。
1.x 分支对应的是 Spring Cloud Edgware 与 Spring Boot 1.x,最低支持 JDK 1.7。
2.spring Cloud Alibaba使用 如果需要使用已发布的版本,在 dependencyManagement 中添加如下配置。
<dependencyManagement > <dependencies > <dependency > <groupId > com.alibaba.cloud</groupId > <artifactId > spring-cloud-alibaba-dependencies</artifactId > <version > 2021.0.5.0</version > <type > pom</type > <scope > import</scope > </dependency > </dependencies > </dependencyManagement >
然后在 dependencies 中添加自己所需使用的依赖即可使用。如果你想选择老版本,可以参考版本说明 。
3.SpringCloud Alibaba-Nacos[作为注册中心 ]
首先,修改 pom.xml 文件,引入 spring-cloud-starter-alibaba-nacos-config ;
<dependency > <groupId > com.alibaba.cloud</groupId > <artifactId > spring-cloud-starter-alibaba-nacos-discovery</artifactId > </dependency >
在应用的 /src/main/resources/application.yaml 配置文件中配置 Nacos 地址并引入服务配置;
spring: cloud: nacos: server-addr: localhost:8848 application: name: gulimall-coupon
3.启动nacos时用命令行启动的话输入以单机模式启动
startup.cmd -m standalone
点击的话可能以集群方式启动就会一直starting
4.加注解@EnableDiscoveryClient,我的nacos2.2.0好像不用加也可以注册成功
4.feign声明式远程调用使用 Feign 使用:
1、导入openfeign包,可以在使用idea构建模块一开始就选择
2、开启@EnableFeignClients (“使用远程调用的包”)功能,只要服务启动自动扫描该包下有@FeignClient注解的接口
3、编写接口,进行远程调用
@RequestMapping("/member/list") public R memberCoupon () { CouponEntity couponEntity = new CouponEntity (); couponEntity.setCouponName("满100减10" ); return R.ok().put("coupons" , Arrays.asList(couponEntity)); }
@Autowired private CouponFeignService couponFeignService;public R test () { MemberEntity memberEntity = new MemberEntity (); memberEntity.setNickname("张三" ); R memberCoupon = couponFeignService.memberCoupon(); return R.ok().put("member" ,memberEntity).put("coupons" ,memberCoupon.get("coupons" )); }
4.SpringCloud Feign在Hoxton.M2 RELEASED版本之后抛弃了Ribbon,使用了spring-cloud-loadbalancer。
<dependency>
    <groupId>org.springframework.cloud</groupId>
    <artifactId>spring-cloud-loadbalancer</artifactId>
</dependency>
5.SpringCloud Alibaba-Nacos配置中心 1.common模块pom文件引入 Nacos Config
<dependency > <groupId > com.alibaba.cloud</groupId > <artifactId > spring-cloud-starter-alibaba-nacos-config</artifactId > </dependency >
gulimall-coupon模块加入(2020.X.X版本官方重构了bootstrap引导配置的加载方式,需要添加以下依赖)(我的gulimall-common加了报错,所以加到了每个微服务里)
<dependency > <groupId > org.springframework.cloud</groupId > <artifactId > spring-cloud-starter-bootstrap</artifactId > </dependency >
2.在resource文件夹下创建bootstrap.properties会优先于application.yml加载
spring.application.name =gulimall-coupon spring.cloud.nacos.config.server-addr =127.0.0.1:8848
3.测试:application.properties加入
coupon.user.name =zhangsan coupon.user.password =123
4.编写controller
@Value("${coupon.user.name}") private String name;@Value("${coupon.user.password}") private int password;@RequestMapping("/test") public R test () { return R.ok().put("name" ,name).put("password" ,password); }
5.注解@RefreshScope(加在Controller层不要放在启动类中,刷新数据不出)或者使用@ConfigurationProperties注解代替@Value注解。
6.nacos中配置列表点加号新建配置文件,文件名为gulimall-coupon.properties看控制台日志确定(也可指定)
7.然后重启服务就可以热部署了(优先使用配置中心中有的配置)
6.spring cloud Gateway(API网关) 理解: (满足某种断言,路由到某个地方)
1.功能
权限控制 :网关作为微服务入口,需要校验用户是是否有请求资格,如果没有则进行拦截。
路由和负载均衡 :一切请求都必须先经过gateway,但网关不处理业务,而是根据某种规则,把请求转发到某个微服务,这个过程叫做路由。当然路由的目标服务有多个时,还需要做负载均衡。
限流 :当请求流量过高时,在网关中按照下流的微服务能够接受的速度来放行请求,避免服务压力过大。
2.网关是一个单独的服务,也可以注册到nacos中
3.使用步骤
3.1注解@EnableDiscoveryClient(看版本是否要加)
3.2引入gulimall-common和cloud-bootstrap依赖并且排除掉mybatisplus相关依赖或者排除掉与数据库有关的自动配置(**@SpringBootApplication(exclude = {DataSourceAutoConfiguration.class})**),不然会报错
Consider the following:
	If you want an embedded database (H2, HSQL or Derby), please put it on the classpath.
	If you have database settings to be loaded from a particular profile you may need to activate it (no profiles are currently active).
3.application.yml案例配置
server: port: 10010 spring: application: name: gateway cloud: nacos: server-addr: localhost:8848 gateway: routes: - id: user-service uri: lb://userservice predicates: - Path=/user/** filters:
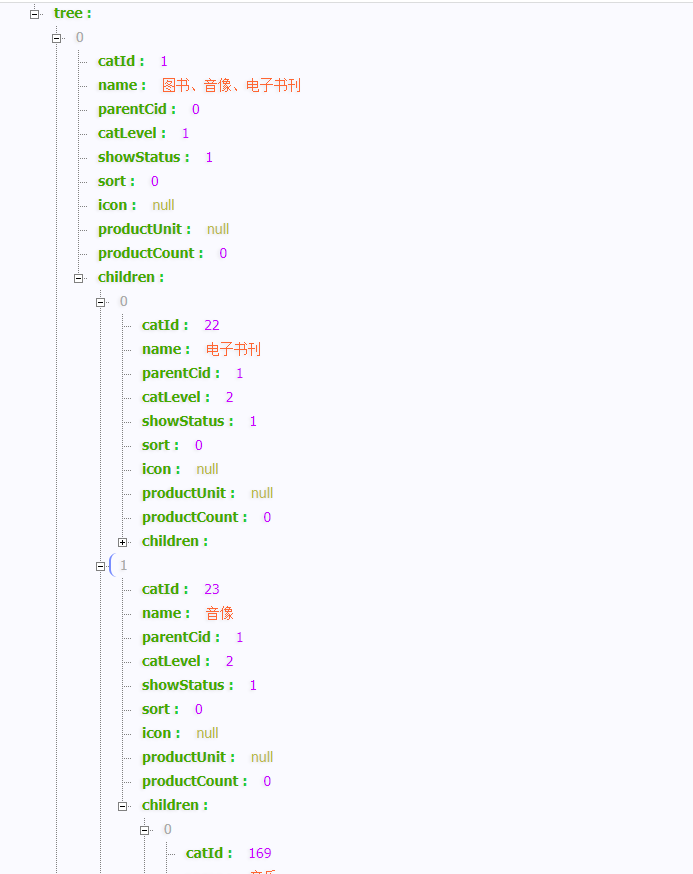
四、商品服务 1.三级分类-递归树形结构数据 1.1controller层CategoryController类
@RequestMapping("/list/tree") public R list () { List<CategoryEntity> listWithTree = categoryService.listWithTree(); return R.ok().put("data" , listWithTree); }
1.2在Entity层CategoryEntity类中加入属性因为该属性不在数据库中,所以exist=false
@TableField(exist = false) private List<CategoryEntity> children;
1.3service层CategoryServiceImpl类(用到了递归和stream流)
public List<CategoryEntity> listWithTree () { List<CategoryEntity> entities = baseMapper.selectList(null ); List<CategoryEntity> level1Menus = entities.stream() .filter(categoryEntity -> categoryEntity.getParentCid() == 0 ) .map(menu -> { menu.setChildren(getChildrens(menu, entities)); return menu; }) .sorted((menu1, menu2) -> (menu1.getSort() == null ? 0 : menu1.getSort()) - (menu2.getSort() == null ? 0 : menu2.getSort())) .collect(Collectors.toList()); return level1Menus; } private List<CategoryEntity> getChildrens (CategoryEntity root,List<CategoryEntity> all) { List<CategoryEntity> children = all.stream() .filter(categoryEntity -> { return categoryEntity.getParentCid() == root.getCatId(); }) .map(menu -> { menu.setChildren(getChildrens(menu, all)); return menu; }) .sorted((menu1, menu2) -> (menu1.getSort() == null ? 0 : menu1.getSort()) - (menu2.getSort() == null ? 0 : menu2.getSort())) .collect(Collectors.toList()); return children; }
1.4启动服务,可知已经分类完成
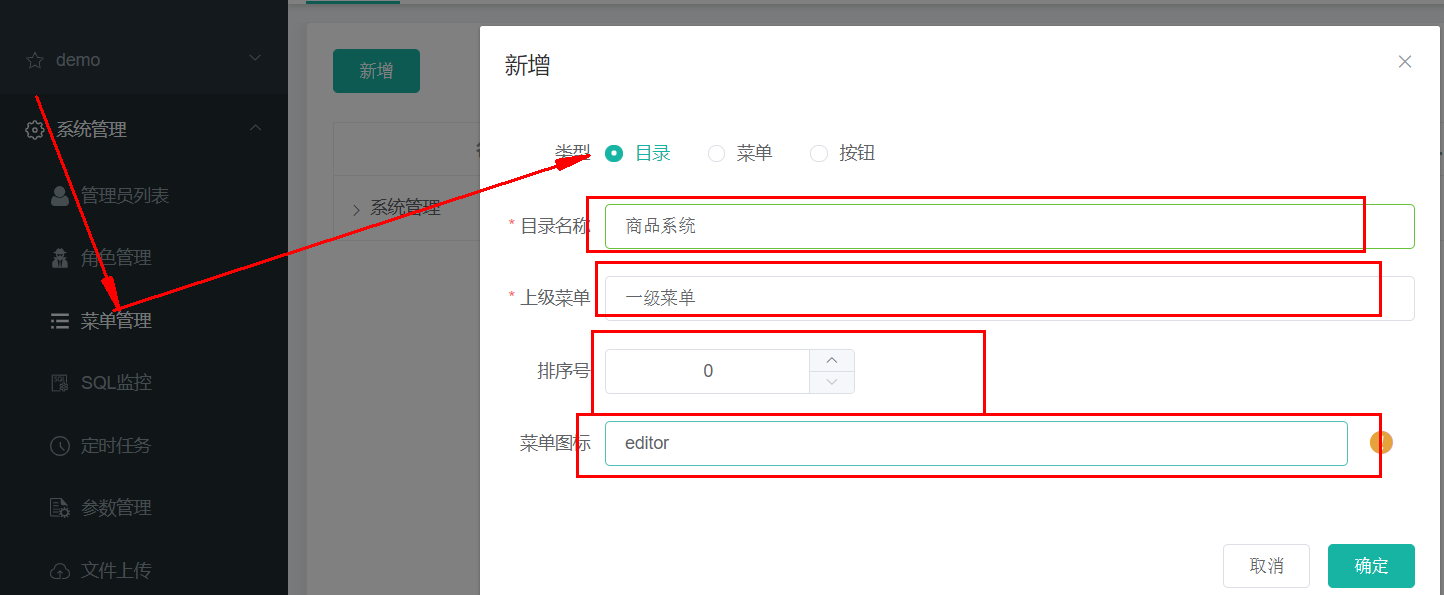
1.5启动renren-fast服务和renren-fast-vue服务(npm run dev)登录后台管理系统后
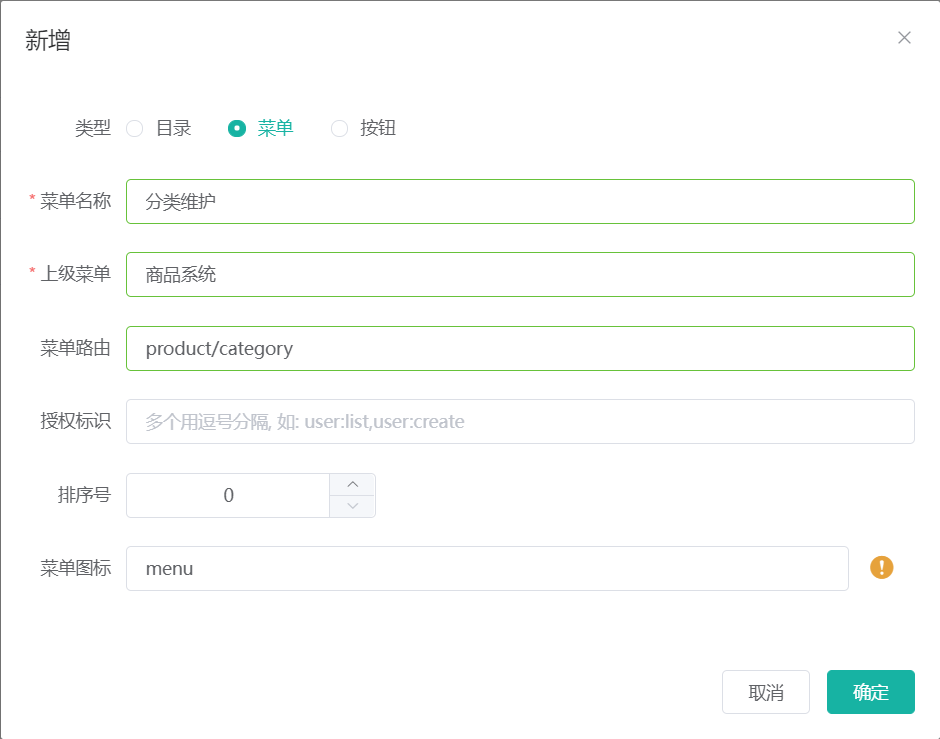
创建一级菜单:
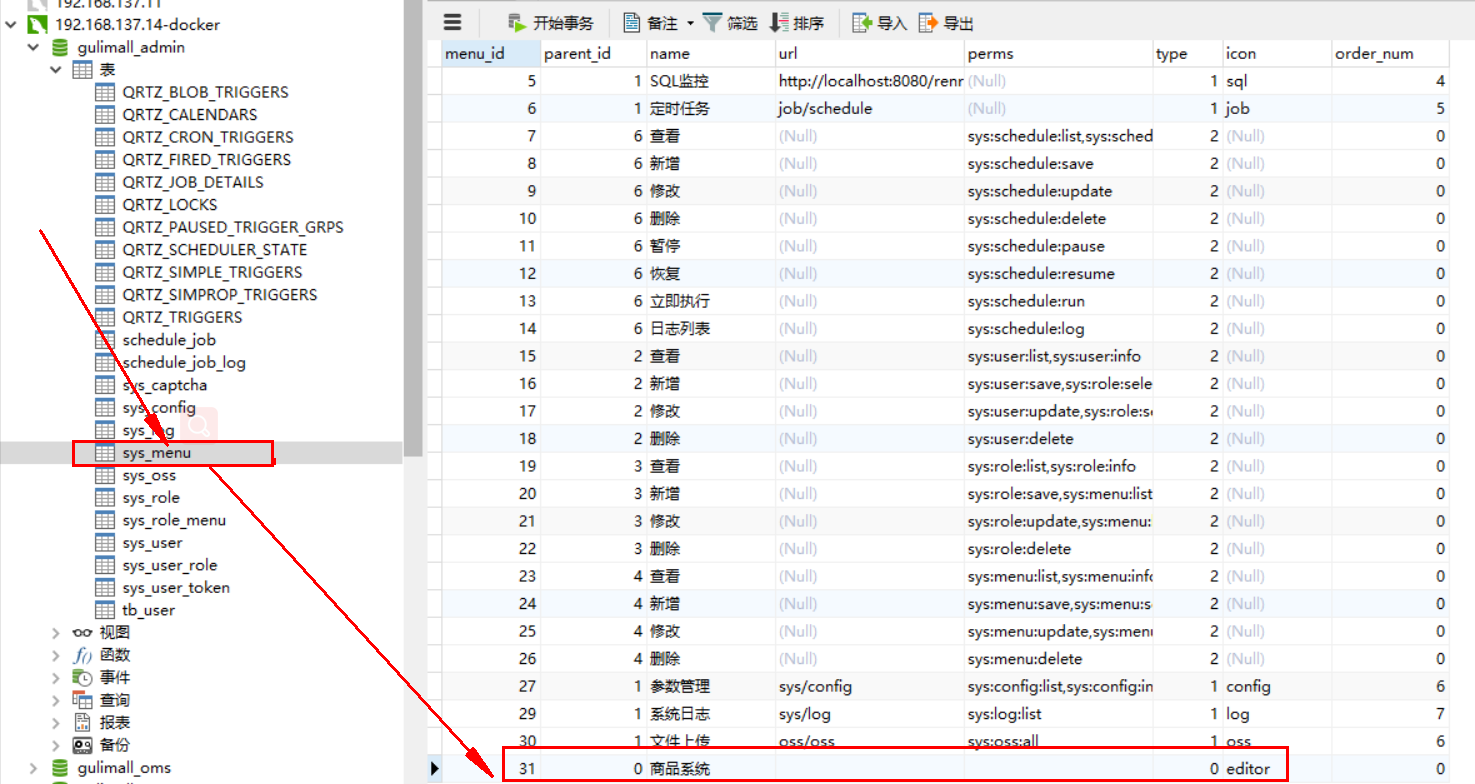
创建完成后,在后台的管理系统中会创建一条记录:
然后创建子菜单:
这个后台管理系统规则为点击分类维护菜单后,product/category路径会被替换为product-category如下:
http://localhost:8001/#/product-category
1.6配置renren-fast-vue文件
创建renren-fast-vue\src\views\modules\product目录,之所以这样创建,是因为product/category,对应于product-category
在该目录下,新建“category.vue”文件:
刷新页面出现404异常,查看请求发现,请求的是“http://localhost:8080/renren-fast/product/category/list/tree”,这个请求是不正确的,正确的请求是:http://localhost:10000/product/category/list/tree,
修正这个问题:
替换“static\config\index.js”文件中的“window.SITE_CONFIG[‘baseUrl’]”
替换前:
window.SITE_CONFIG['baseUrl'] = 'http://localhost:8080/renren-fast';
替换后:带上前缀/api在网关中容易区分路由到哪个微服务
window.SITE_CONFIG['baseUrl'] = 'http://localhost:88/api';
http://localhost:88,这个地址是我们网关微服务的接口。
1.7将renren-fast注册到nacos,通过网关路由到该服务
修改依赖
<spring-boot.version > 2.6.13</spring-boot.version >
引入依赖
<dependency > <groupId > com.atguigu.gulimall</groupId > <artifactId > gulimall-common</artifactId > <version > 0.0.1-SNAPSHOT</version > </dependency > <dependency > <groupId > org.springframework.boot</groupId > <artifactId > spring-boot-starter-web</artifactId > </dependency >
在application.yml中加入配置
application: name: renren-fast cloud: nacos: discovery: server-addr: 192.168 .137 .14 :8848 config: name: renren-fast server-addr: 192.168 .137 :8848 namespace: ee409c3f-3206-4a3b-ba65-7376922a886d
配置网关路由,前台的所有请求都是经由“http://localhost:88/api”来转发的,在“gulimall-gateway”中添加路由规则:
- id: admin_route
  uri: lb://renren-fast
  predicates:
    - Path=/api/**
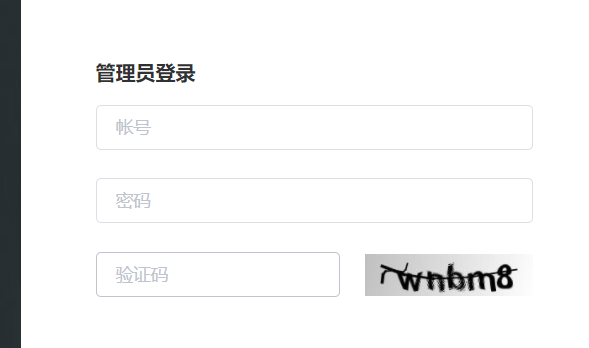
但是当我们访问:http://localhost:8001/#/login,发现验证码不显示:
分析原因:
现在的验证码请求路径为,http://localhost:88/api/captcha.jpg?uuid=69c79f02-d15b-478a-8465-a07fd09001e6
原始的验证码请求路径:http://localhost:8001/renren-fast/captcha.jpg?uuid=69c79f02-d15b-478a-8465-a07fd09001e6
在admin_route的路由规则下,在访问路径中包含了“api”,因此它会将它转发到renren-fast,网关在转发的时候,会使用网关的前缀信息,为了能够正常的取得验证码,我们需要对请求路径进行重写
1.8路径重写
修改路由规则
- id: admin_route uri: lb://renren-fast predicates: - Path=/api/** filters: - RewritePath=/api/(?<segment>/?.*), /renren-fast/$\{segment}
报错503
在网关服务pom文件中加入
<dependency > <groupId > org.springframework.cloud</groupId > <artifactId > spring-cloud-loadbalancer</artifactId > </dependency >
原因:
springcloud2020弃用了Ribbon,因此Alibaba在2021版本nacos中删除了Ribbon的jar包
请求状态为200,可是验证码不出现
renren-fast控制台报错
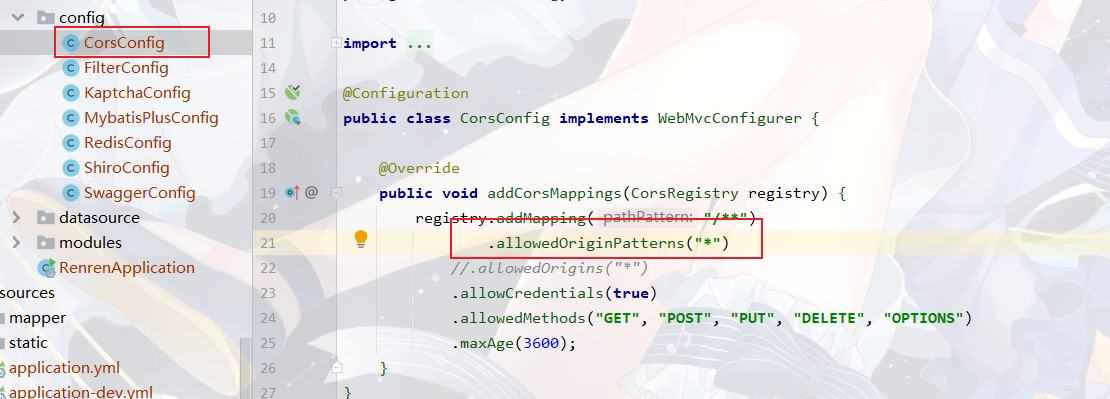
When allowCredentials is true, allowedOrigins cannot contain the special value “*” since that cannot be set on the “Access-Control-Allow-Origin” response header. To allow credentials to a set of origins, list them explicitly or consider using “allowedOriginPatterns” instead.
解决:renren-fast corsConfig类将.allowedOrigins(““)替换为.allowedOriginPatterns(“ “)
1.9访问被拒403和CORS错误(跨域)
控制台报错:
Access to XMLHttpRequest at ‘http://localhost:88/api/sys/login ‘ from origin ‘http://localhost:8001 ‘ has been blocked by CORS policy: Response to preflight request doesn’t pass access control check: No ‘Access-Control-Allow-Origin’ header is present on the requested resource.
问题描述:已拦截跨源请求:同源策略禁止读取位于 http://localhost:88/api/sys/login 的远程资源。(原因:CORS 头缺少 ‘Access-Control-Allow-Origin’)。 就是说8001给远程的88端口发送请求默认是不允许的,利用同源策略限制。
问题分析:这是一种跨域问题。访问的域名和端口和原来的请求不同,请求就会被限制
解决:
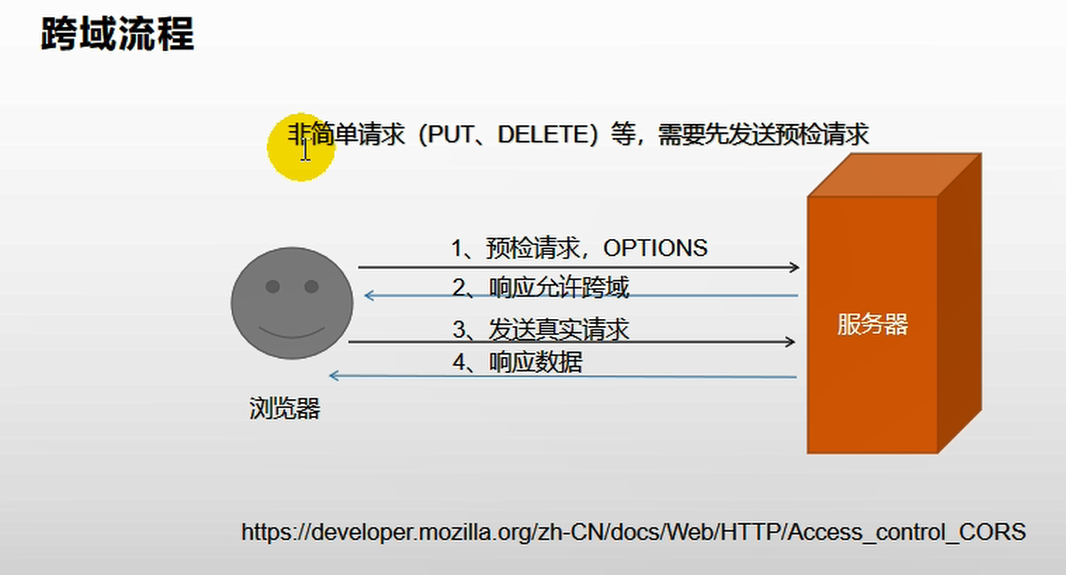
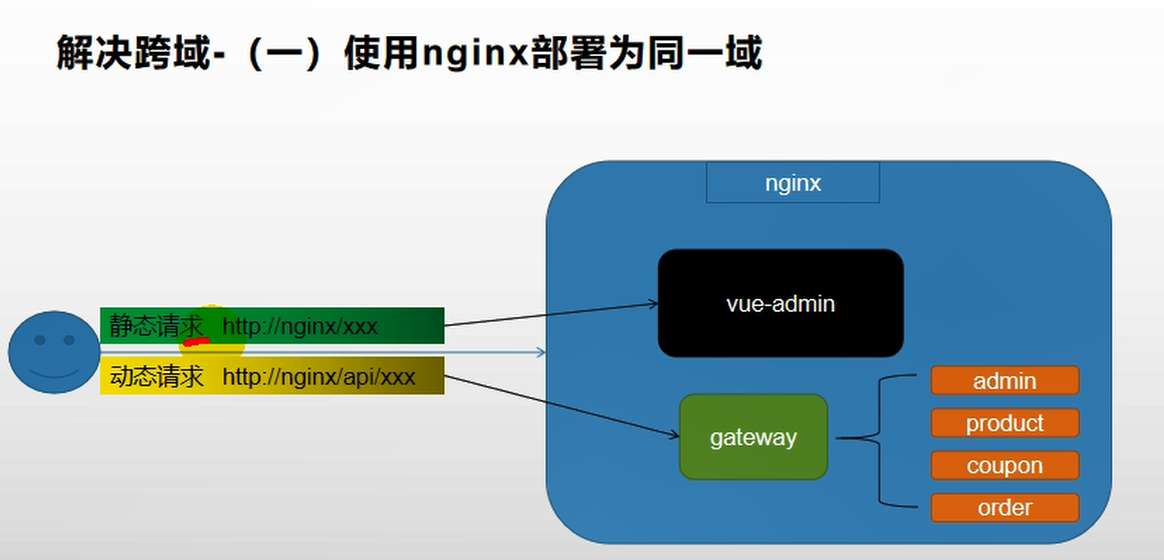
因为这个登录请求是非简单请求,所以会在发送请求之前发送预检请求OPTIONS,询问服务器是否允许跨域,那么我们只需配置当次请求允许跨域即可。网关统一配置跨域
跨域流程:
解决方法:在网关中定义“GulimallCorsConfiguration”类,该类用来做过滤,允许所有的请求跨域。
@Configuration public class GulimallCorsConfiguration { @Bean public CorsWebFilter corsWebFilter () { UrlBasedCorsConfigurationSource source = new UrlBasedCorsConfigurationSource (); CorsConfiguration corsConfiguration = new CorsConfiguration (); corsConfiguration.addAllowedHeader("*" ); corsConfiguration.addAllowedMethod("*" ); corsConfiguration.addAllowedOriginPattern("*" ); corsConfiguration.setAllowCredentials(true ); source.registerCorsConfiguration("/**" ,corsConfiguration); return new CorsWebFilter (source); } }
再次访问:http://localhost:8001/#/login
n-fast/captcha.jpg?uuid=69c79f02-d15b-478a-8465-a07fd09001e6
出现了多个请求,并且也存在多个跨源请求。
原因:renren-fast项目也配置了跨域
为了解决这个问题,需要修改renren-fast项目,注释掉“io.renren.config.CorsConfig”类。然后再次进行访问,成功登录。
1.10显示分类信息
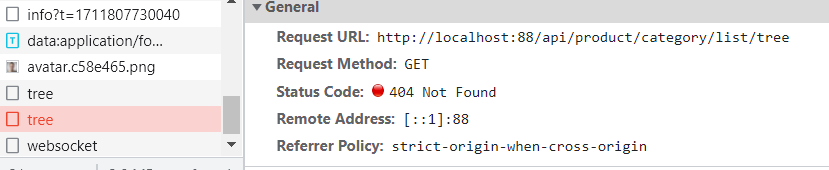
在显示分类信息的时候,出现了404异常,请求的http://localhost:88/api/product/category/list/tree不存在
,/$\{segment}
在路由规则的顺序上,将精确的路由规则放置到模糊的路由规则的前面,否则的话,精确的路由规则将不会被匹配到,类似于异常体系中try catch子句中异常的处理顺序。
2.三级分类-菜单删除、新增和修改 2.1测试删除
添加delete和append标识,并且增加复选框
<el-tree
   :data="menus"
   show-checkbox  //显示复选框
   :props="defaultProps"
   :expand-on-click-node="false" //设置节点点击时不展开
   node-key="catId"
 >
   <span class="custom-tree-node" slot-scope="{ node, data }">
     <span>{{ node.label }}</span>
     <span>
       <el-button v-if="node.level <= 2" type="text" size="mini" @click="() => append(data)">Append</el-button>
       <el-button
         v-if="node.childNodes.length == 0"
         type="text"
         size="mini"
         @click="() => remove(node, data)"
       >Delete</el-button>
     </span>
   </span>
 </el-tree>
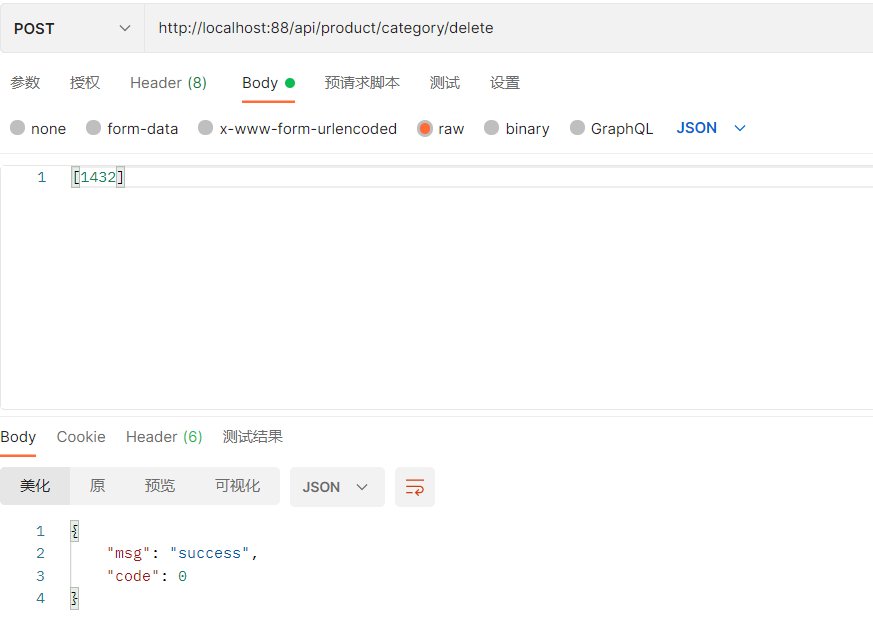
测试删除数据,打开postman输入“ http://localhost:88/api/product/category/delete ”,请求方式设置为POST,为了比对效果,可以在删除之前查询数据库的pms_category表:
由于delete请求接收的是一个数组,所以这里使用JSON方式,传入了一个数组:
再次查询数据库能够看到cat_id为1432的数据已经被删除了。
修改“com.bigdata.gulimall.product.controller.CategoryController”类,添加如下代码:
@RequestMapping("/delete") public R delete (@RequestBody Long[] catIds) { categoryService.removeMenuByIds(Arrays.asList(catIds)); return R.ok(); }
com.bigdata.gulimall.product.service.impl.CategoryServiceImpl
@Override public void removeMenuByIds (List<Long> asList) { categoryDao.deleteBatchIds(asList); }
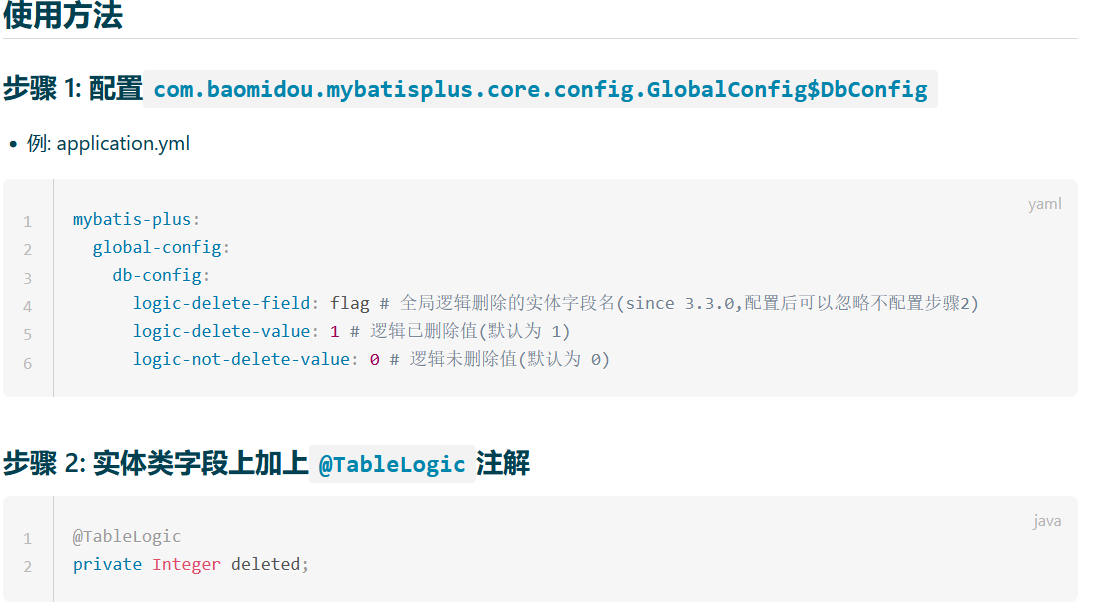
2.2逻辑删除 (我的版本是3.2.0)
然而多数时候,我们并不希望删除数据,而是标记它被删除了,这就是逻辑删除;
可以设置show_status为0,标记它已经被删除。
mybatis-plus的逻辑删除:
配置全局的逻辑删除规则,在“src/main/resources/application.yml”文件中添加如下内容:
mybatis-plus:
  global-config:
    db-config:
      id-type: auto
      logic-delete-value: 1
      logic-not-delete-value: 0
修改“com.bigdata.gulimall.product.entity.CategoryEntity”类,添加上@TableLogic,表明使用逻辑删除:
@TableLogic(value = "1",delval = "0") private Integer showStatus;
然后在POSTMan中测试一下是否能够满足需要。另外在“src/main/resources/application.yml”文件中,设置日志级别,打印出SQL语句:
logging:
  level:
    com.bigdata.gulimall.product: debug
打印的日志:
==> Preparing: UPDATE pms_category SET show_status=0 WHERE cat_id IN ( ? ) AND show_status=1 ==> Parameters: 1431 (Long) <== Updates: 1 get changedGroupKeys:[]
前端代码片段
remove(node, data) {
  var ids = [data.catId];
  this.$confirm(`是否删除【${data.name}】菜单?`, "提示", {
    confirmButtonText: "确定",
    cancelButtonText: "取消",
    type: "warning",
  }).then(() => {
    this.$http({
      url: this.$http.adornUrl("/product/category/delete"),
      method: "post",
      data: this.$http.adornData(ids, false),
    })
      .then(({ data }) => {
        this.$message({
          message: "菜单删除成功",
          type: "success",
        });
        this.getMenus();
        //设置默认展开菜单
        this.expandedKey = [node.parent.data.catId]
      })
      .catch(() => {
      });
  });

  console.log("remove", node, data);
},
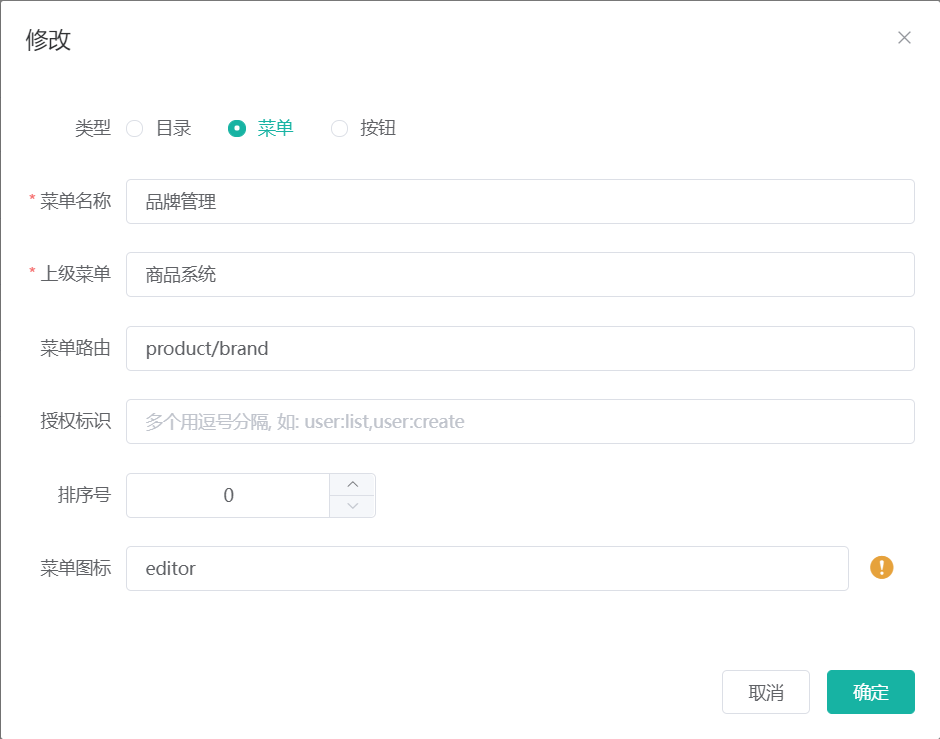
2.3新增和修改
页面
<div>
   <el-tree
     :data="menus"
     :props="defaultProps"
     :expand-on-click-node="false"
     :default-expanded-keys="expandedKey"
     show-checkbox
     node-key="catId"
   >
     <span class="custom-tree-node" slot-scope="{ node, data }">
       <span>{{ node.label }}</span>
       <span>
         <el-button
           v-if="node.level <= 2"
           type="text"
           size="mini"
           @click="() => append(data)"
         >
           Append
         </el-button>
         <el-button type="text" size="mini" @click="() => edit(data)">
           edit
         </el-button>
         <el-button
           v-if="node.childNodes.length == 0"
           type="text"
           size="mini"
           @click="() => remove(node, data)"
         >
           Delete
         </el-button>
       </span>
     </span>
   </el-tree>
   <el-dialog
     :title="title"
     :visible.sync="dialogVisible"
     width="30%"
     :close-on-click-modal="false"
   >
     <el-form :model="category">
       <el-form-item label="分类名称">
         <el-input v-model="category.name" autocomplete="off"></el-input>
       </el-form-item>
       <el-form-item label="图标">
         <el-input v-model="category.icon" autocomplete="off"></el-input>
       </el-form-item>
       <el-form-item label="计量单位">
         <el-input v-model="category.productUnit" autocomplete="off"></el-input>
       </el-form-item>
     </el-form>
     <span slot="footer" class="dialog-footer">
       <el-button @click="dialogVisible = false">取 消</el-button>
       <el-button type="primary" @click="submitData">确 定</el-button>
     </span>
   </el-dialog>
 </div>
data
data() {
    return {
      title: "",
      dialogType: "",
      category: {
        name: "",
        parentCid: 0,
        catLevel: 0,
        showStatus: 1,
        sort: 0,
        icon: "",
        productUnit: "",
        catId: null,
      },
      dialogVisible: false,
      menus: [],
      expandedKey: [],
      defaultProps: {
        children: "children",
        label: "name",
      },
    };
方法
getMenus() {
      this.$http({
        url: this.$http.adornUrl("/product/category/list/tree"),
        method: "get",
      }).then(({ data }) => {
        console.log("成功获取到菜单数据", data.tree);
        this.menus = data.tree;
      });
    },
    append(data) {
      console.log("append", data);
      this.dialogType = "add";
      this.title = "添加分类";
      this.dialogVisible = true;
      this.category.parentCid = data.catId;
      this.category.catLevel = data.catLevel * 1 + 1;
      this.category.catId = null;
      this.category.name = null;
      this.category.icon = "";
      this.category.productUnit = "";
      this.category.showStatus = 1;
      this.category.sort = 0;
    },

    remove(node, data) {
      var ids = [data.catId];
      this.$confirm(`是否删除【${data.name}】菜单?`, "提示", {
        confirmButtonText: "确定",
        cancelButtonText: "取消",
        type: "warning",
      }).then(() => {
        this.$http({
          url: this.$http.adornUrl("/product/category/delete"),
          method: "post",
          data: this.$http.adornData(ids, false),
        })
          .then(({ data }) => {
            this.$message({
              message: "菜单删除成功",
              type: "success",
            });
            this.getMenus();
            //设置默认展开菜单
            this.expandedKey = [node.parent.data.catId];
          })
          .catch(() => {});
      });

      console.log("remove", node, data);
    },
    //添加三级分类
    addCategory() {
      console.log("提交的三级分类数据", this.category);
      this.$http({
        url: this.$http.adornUrl("/product/category/save"),
        method: "post",
        data: this.$http.adornData(this.category, false),
      }).then(({ data }) => {
        this.$message({
          message: "菜单保存成功",
          type: "success",
        });
      });
      //关闭对话框
      this.dialogVisible = false;
      this.getMenus();
      //设置默认展开菜单
      this.expandedKey = [this.category.parentCid];
    },
    edit(data) {
      console.log("要修改的数据", data);
      this.dialogType = "edit";
      this.title = "修改分类";
      this.dialogVisible = true;

      this.$http({
        url: this.$http.adornUrl(`/product/category/info/${data.catId}`),
        method: "get",
      }).then(({ data }) => {
        //请求成功
        console.log("要回显的数据", data);
        this.category.name = data.data.name;
        this.category.catId = data.data.catId;
        this.category.icon = data.data.icon;
        this.category.productUnit = data.data.productUnit;
        this.category.parentCid = data.data.parentCid;
        this.category.catLevel = data.data.catLevel;
        this.category.showStatus = data.data.showStatus;
        this.category.sort = data.data.sort;
      });
    },
    //修改三级分类数据
    editCategory() {
      //解构
      var { catId, name, icon, productUnit } = this.category;
      console.log("productUnit",this.category.productUnit);
      this.$http({
        url: this.$http.adornUrl("/product/category/update"),
        method: "post",
        data: this.$http.adornData({ catId, name, icon, productUnit }, false),
      }).then(({ data }) => {
        this.$message({
          message: "菜单修改成功",
          type: "success",
        });
        //关闭对话框
        this.dialogVisible = false;
        this.getMenus();
        //设置默认展开菜单
        this.expandedKey = [this.category.parentCid];
      });
    },
    submitData() {
      if (this.dialogType == "add") {
        this.addCategory();
      }
      if (this.dialogType == "edit") {
        this.editCategory();
      }
    },
3.三级分类-修改-菜单拖拽
同一个菜单内拖动
正常
拖动到父菜单的前面或后面
正常
拖动到父菜单同级的另外一个菜单中
正常
关注的焦点在于,拖动到目标节点中,使得目标节点的catlevel+deep小于3即可。拖动到目标节点前后的条件是,使得
拖动菜单时需要修改顺序和级别
需要考虑两种类型节点的catLevel
一种关系是:如果是同一个节点下的子节点的前后移动,则不需要修改其catLevel
如果是拖动到另外一个节点内或父节点中,则要考虑修改其catLevel
如果拖动到与父节点平级的节点关系中,则要将该拖动的节点的catLevel,设置为兄弟节点的Level,
先考虑parentCid还是先考虑catLevel?
两种关系在耦合
另外还有一种是前后拖动的情况
哪个范围最大?
肯定是拖动类型关系最大,
如果是前后拖动,则拖动后需要看待拖动节点的层级和设置待拖动节点的parentId,
如果待拖动节点和目标节点的层级相同,则认为是同级拖动,只需要修改节点的先后顺序即可;
否则认为是跨级拖动,则需要修改层级和重新设置parentID
如果
以拖动类型来分,并不合适,比较合适的是跨级拖动和同级拖动
如何判断是跨级拖动还是同级拖动,根据拖动的层级来看,如果是同一级的拖动,只需要修改先后顺序即可,但是这样也会存在一个问题,就是当拖动到另外一个分组下的同级目录中,显然也需要修改parentID,究竟什么样的模型最好呢?
另外也可以判断在跨级移动时,跨级后的parentID是否相同,如果不相同,则认为是在不同目录下的跨级移动需要修改parentID。
顺序、catLevel和parentID
同级移动:
(1)首先判断待移动节点和目标节点的catLevel是否相同,
(2)相同则认为是同级移动,
如果此时移动后目标节点的parentID和待移动节点的相同,但是移动类型是前后移动,只需要调整顺序即可,此时移动类型是inner,则需要修改catLevel和parentId和顺序
如果此时移动后目标节点的parentID和待移动节点的不相同,但是移动类型是前后移动,则需要调整顺序和parentId,此时移动类型是inner,则需要修改catLevel和parentId和顺序
通过这两步的操作能看到一些共性,如果抽取移动类型作为大的分类,则在这种分类下,
如果是前后移动,则分为下面几种情况:
同级别下的前后移动:界定标准为catLevel相同,但是又可以分为parentID相同和parentID不同,parent相同时,只需要修改顺序即可;parentID不同时,需要修改parentID和顺序
不同级别下的前后移动:界定标准为catLevel不同,此时无论如何都要修改parentID,顺序和catLevel
如果是inner类型移动,则分为一下的几种情况。
此时不论是同级inner,还是跨级innner,都需要修改parentID,顺序和catLevel
哪种情况需要更新子节点呢?
那就要看要拖拽的节点是否含有子节点,如果有子节点,则需要更新子节点的catLevel,不需要更新它之间的顺序和parentId,只需要更新catLevel即可。这种更新子节点的Level应该归类,目前的目标是只要有子节点就更新它的catLevel,
(2)如果待移动节点和目标节点的catLevel不同,则认为是跨级移动。如果是移动到父节点中,则需要设置catLevel,parentID和顺序。此时需要分两种情况来考虑,如果是移动到父节点中,则需要设置catLevel,parentID和顺序,如果是移动到兄弟节点中,则需要设置
包含移动到父节点同级目录,兄弟节点中。
@RequestMapping("/update/sort") public R update (@RequestBody CategoryEntity[] category) { categoryService.updateBatchById(Arrays.asList(category)); return R.ok(); }
设置菜单拖动开关
<el-switch v-model="draggable" active-text="开启拖拽" inactive-text="关闭拖拽"></el-switch>
但是现在存在的一个问题是每次拖拽的时候,都会发送请求,更新数据库这样频繁的与数据库交互,现在想要实现一个拖拽过程中不更新数据库,拖拽完成后,统一提交拖拽后的数据。
现在还存在一个问题,如果是将一个菜单连续的拖拽,最终还放到了原来的位置,但是updateNode中却出现了很多节点更新信息,这样显然也是一个问题。
批量删除
<el-button type="danger" plain size="small" @click="batchDelete">批量删除</el-button>
batchDelete ( let checkNodes = this .$refs .menuTree .getCheckedNodes (); let catIds = []; for (let i = 0 ; i < checkNodes.length ; i++) { catIds.push (checkNodes[i].catId ); } this .$confirm(`确定要删除?` , "提示" , { confirmButtonText : "确定" , cancelButtonText : "取消" , type : "warning" }) .then (() => { this .$http({ url : this .$http .adornUrl ("/product/category/delete" ), method : "post" , data : this .$http .adornData (catIds, false ) }).then (({ data } ) => { this .$message({ message : "菜单批量删除成功" , type : "success" }); this .getMeus (); }); }) .catch (() => { }); },
4.品牌管理菜单 4.1后台管理系统添加,品牌管理菜单
(2)将“”逆向工程得到的resources\src\views\modules\product文件拷贝到gulimall/renren-fast-vue/src/views/modules/product目录下,也就是下面的两个文件
brand.vue 和brand-add-or-update.vue
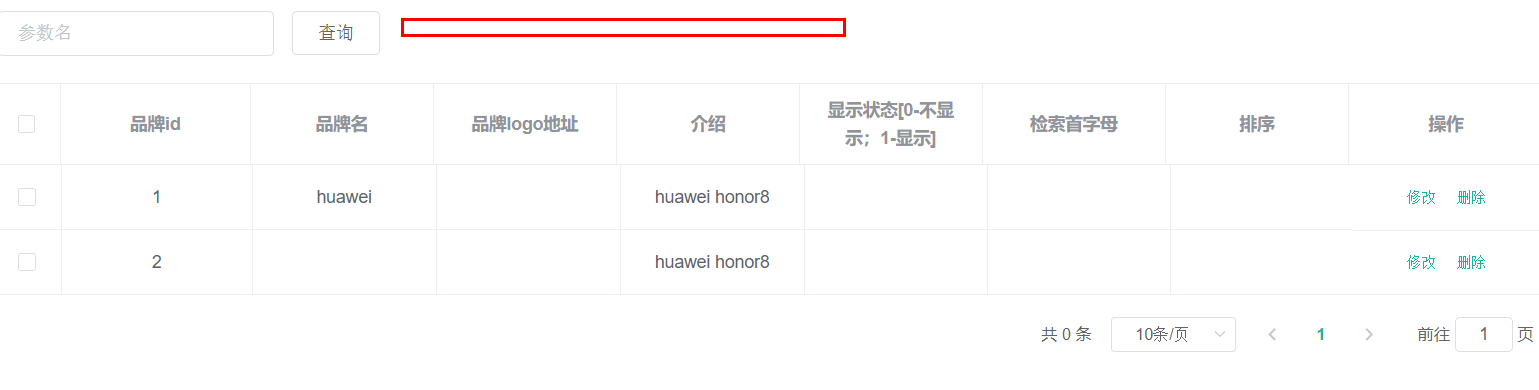
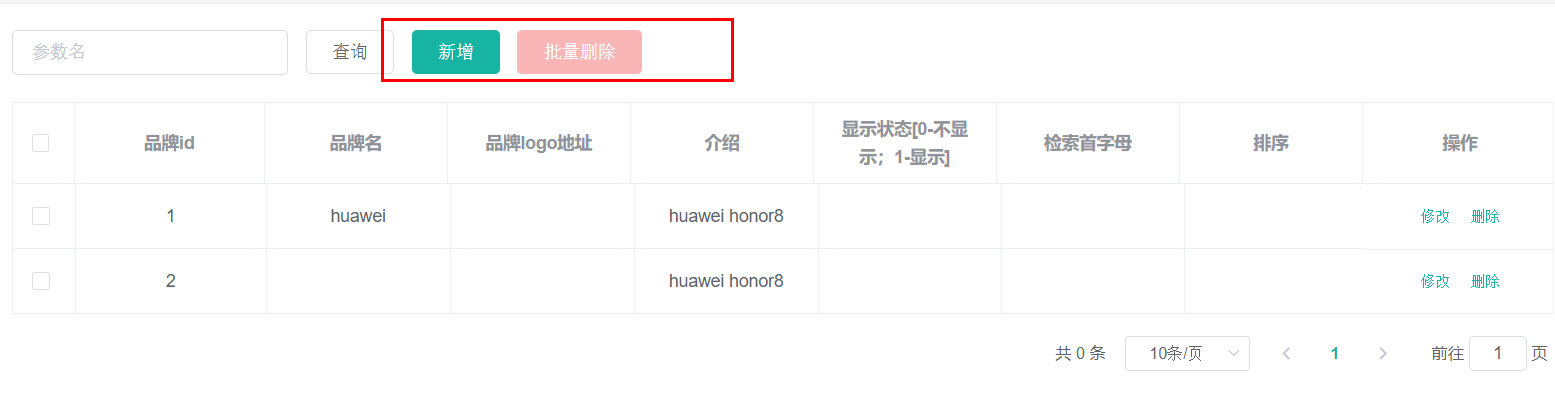
但是显示的页面没有新增和删除功能,这是因为权限控制的原因,
<el-button v-if="isAuth('product:brand:save')" type="primary" @click="addOrUpdateHandle()">新增</el-button>
<el-button v-if="isAuth('product:brand:delete')" type="danger" @click="deleteHandle()" :disabled="dataListSelections.length <= 0">批量删除</el-button>
查看“isAuth”的定义位置:
它是在“index.js”中定义,现在将它设置为返回值为true,即可显示添加和删除功能。
再次刷新页面能够看到,按钮已经出现了:
4.2添加“显示状态按钮” brand.vue
<template slot-scope="scope">
  <el-switch
    v-model="scope.row.showStatus"
    active-color="#13ce66"
    inactive-color="#ff4949"
    @change="updateBrandStatus(scope.row)"
    :active-value = "1"//绑定数字0,1
    :inactive-value	= "0"
  ></el-switch>
</template>
brand-add-or-update.vue
<el-form-item label="显示状态" prop="showStatus">
   <el-switch v-model="dataForm.showStatus" active-color="#13ce66" inactive-color="#ff4949"></el-switch>
</el-form-item>
updateBrandStatus (data ) { console .log ("最新状态" , data); let {brandId,showStatus} = data; this .$http({ url : this .$http .adornUrl ("/product/brand/update" ), method : "post" , data : this .$http .adornData ({brandId,showStatus}, false ) }).then (({ data } ) => { this .$message({ message : "状态更新成功" , type : "success" }); }); },
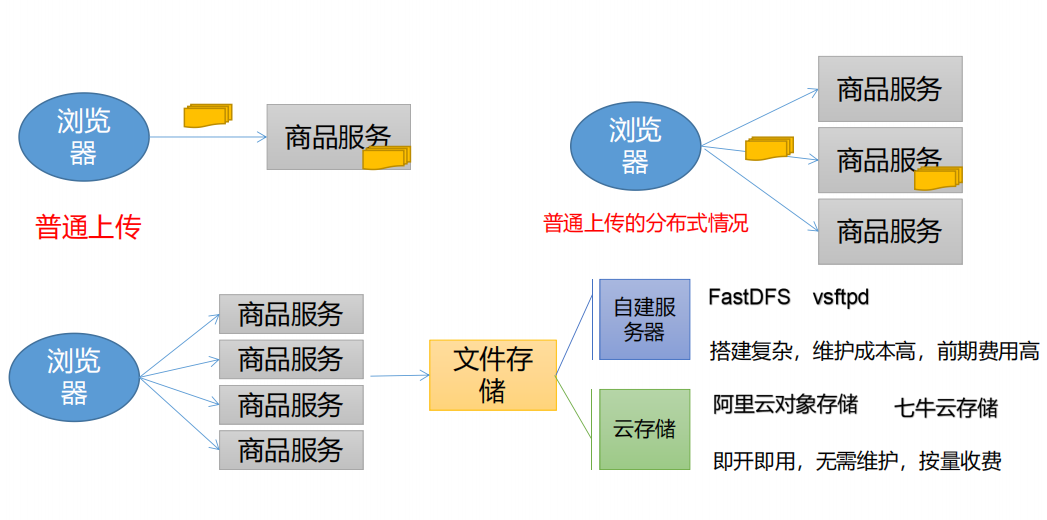
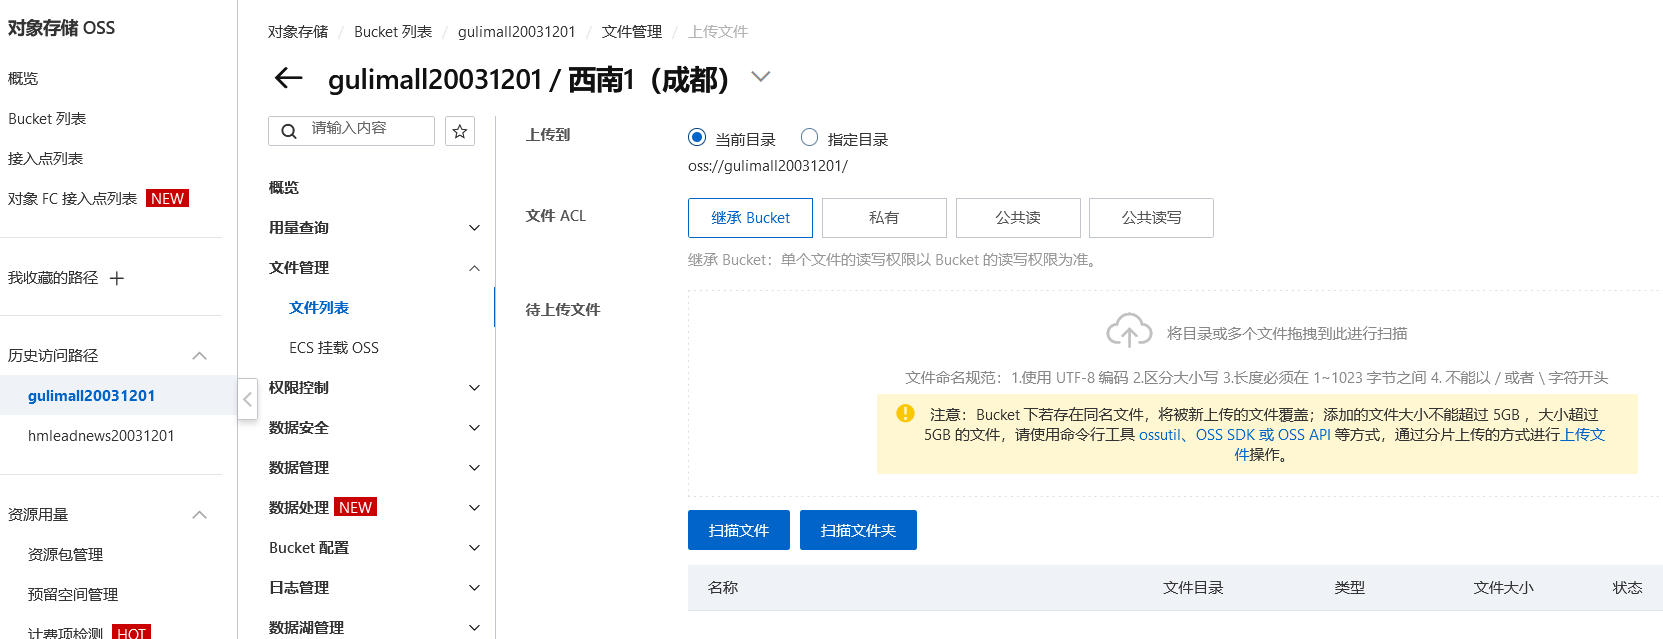
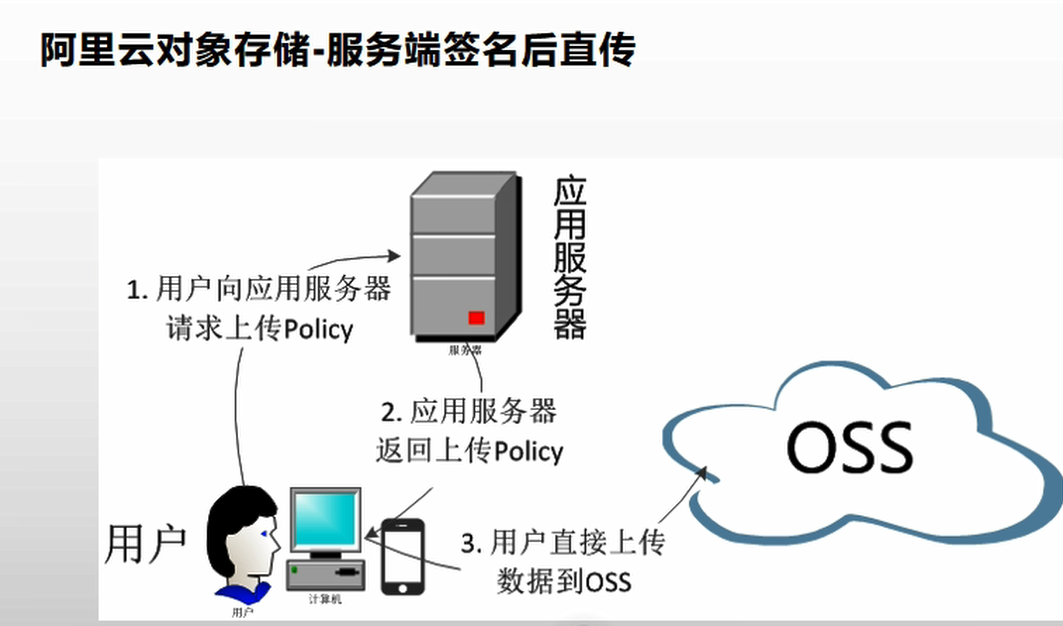
4.3添加文件上传(分布式)采用阿里云对象存储
上传模型:防止密码泄露,缓解应用服务器压力
查看阿里云关于文件上传的帮助: https://help.aliyun.com/document_detail/32009.html?spm=a2c4g.11186623.6.768.549d59aaWuZMGJ
采用spring cloud alibaba的start依赖更为简单 详情:
https://github.com/alibaba/aliyun-spring-boot/blob/master/aliyun-spring-boot-samples/aliyun-oss-spring-boot-sample/README-zh.md
(1).gulimall-third-party服务引入依赖
<dependency > <groupId > com.alibaba.cloud</groupId > <artifactId > aliyun-oss-spring-boot-starter</artifactId > <exclusions > <exclusion > <groupId > com.aliyun</groupId > <artifactId > aliyun-java-sdk-core</artifactId > </exclusion > </exclusions > </dependency > <dependencyManagement > <dependencies > <dependency > <groupId > com.alibaba.cloud</groupId > <artifactId > aliyun-spring-boot-dependencies</artifactId > <version > 1.0.0</version > <type > pom</type > <scope > import</scope > </dependency > </dependencies > </dependencyManagement >
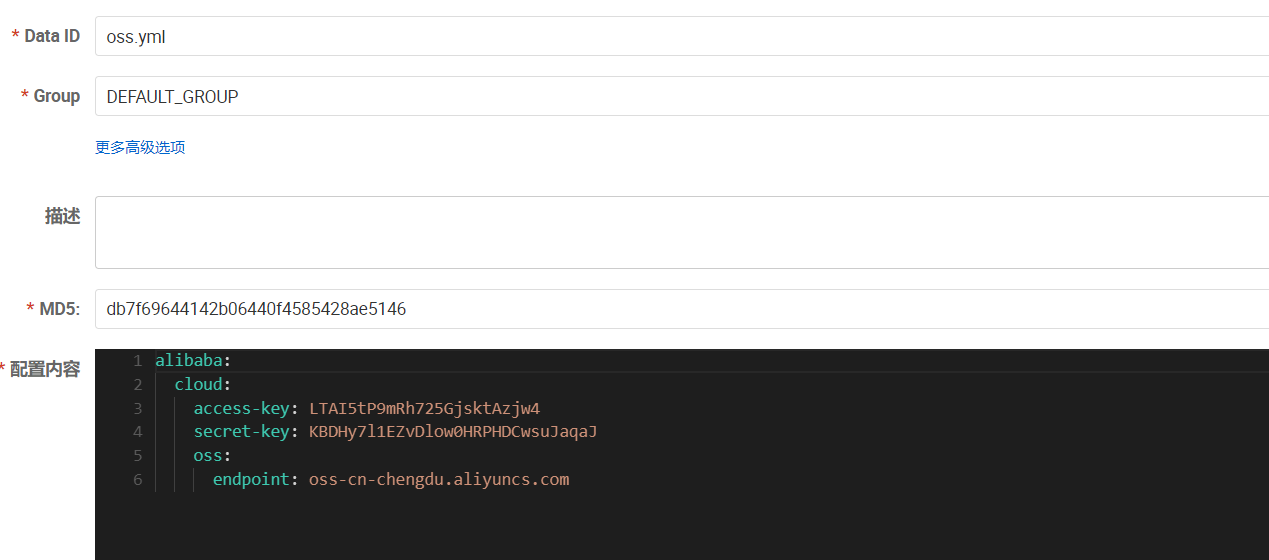
2).在gulimall-third-party服务oss.yml配置文件中配置 OSS 服务对应的 accessKey、secretKey 和 endpoint。
3).引入服务注册和配置中心
pom.xml
<dependency > <groupId > com.alibaba.cloud</groupId > <artifactId > aliyun-oss-spring-boot-starter</artifactId > <exclusions > <exclusion > <groupId > com.aliyun</groupId > <artifactId > aliyun-java-sdk-core</artifactId > </exclusion > </exclusions > </dependency > <dependency > <groupId > com.atguigu.gulimall</groupId > <artifactId > gulimall-common</artifactId > <version > 0.0.1-SNAPSHOT</version > <exclusions > <exclusion > <groupId > com.baomidou</groupId > <artifactId > mybatis-plus-boot-starter</artifactId > //不排除要配置数据源,不然报错 </exclusion > </exclusions > </dependency > <dependency > <groupId > org.springframework.cloud</groupId > <artifactId > spring-cloud-starter-bootstrap</artifactId > </dependency > <dependencyManagement > <dependencies > <dependency > <groupId > org.springframework.cloud</groupId > <artifactId > spring-cloud-dependencies</artifactId > <version > ${spring-cloud.version}</version > <type > pom</type > <scope > import</scope > </dependency > <dependency > <groupId > com.alibaba.cloud</groupId > <artifactId > spring-cloud-alibaba-dependencies</artifactId > <version > 2021.0.5.0</version > <type > pom</type > <scope > import</scope > </dependency > <dependency > <groupId > org.springframework.boot</groupId > <artifactId > spring-boot-dependencies</artifactId > <version > ${spring-boot.version}</version > <type > pom</type > <scope > import</scope > </dependency > <dependency > <groupId > com.alibaba.cloud</groupId > <artifactId > aliyun-spring-boot-dependencies</artifactId > <version > 1.0.0</version > <type > pom</type > <scope > import</scope > </dependency > </dependencies > </dependencyManagement >
bootstrap.properties:
spring.application.name =gulimall-third-party spring.cloud.nacos.config.server-addr =127.0.0.1:8848 spring.cloud.nacos.config.namespace =a192f48e-ee37-40f5-bdd5-07f60caedf8c spring.cloud.nacos.config.extension-configs[0].data-id =oss.yml spring.cloud.nacos.config.extension-configs[0].group =DEFAULT_GROUP spring.cloud.nacos.config.extension-configs[0].refresh =true
application.yml:
spring: cloud: nacos: discovery: server-addr: 127.0 .0 .1 :8848 application: name: gulimall-third-party server: port: 30000
4)controller层代码
@RestController public class OssController { @Autowired OSS ossClient; @Value("${alibaba.cloud.oss.endpoint}") private String endpoint; @Value("${alibaba.cloud.oss.bucket}") private String bucket; @Value("${alibaba.cloud.access-key}") private String accessId; @RequestMapping("/oss/policy") public R policy () { String host = "https://" +bucket+"." +endpoint; String format = new SimpleDateFormat ("yyyy-MM-dd" ).format(new Date ()); String dir = format + "/" ; Map<String, String> respMap = null ; try { long expireTime = 30 ; long expireEndTime = System.currentTimeMillis() + expireTime * 1000 ; Date expiration = new Date (expireEndTime); PolicyConditions policyConds = new PolicyConditions (); policyConds.addConditionItem(PolicyConditions.COND_CONTENT_LENGTH_RANGE, 0 , 1048576000 ); policyConds.addConditionItem(MatchMode.StartWith, PolicyConditions.COND_KEY, dir); String postPolicy = ossClient.generatePostPolicy(expiration, policyConds); byte [] binaryData = postPolicy.getBytes("utf-8" ); String encodedPolicy = BinaryUtil.toBase64String(binaryData); String postSignature = ossClient.calculatePostSignature(postPolicy); respMap = new LinkedHashMap <String, String>(); respMap.put("accessid" , accessId); respMap.put("policy" , encodedPolicy); respMap.put("signature" , postSignature); respMap.put("dir" , dir); respMap.put("host" , host); respMap.put("expire" , String.valueOf(expireEndTime / 1000 )); } catch (Exception e) { System.out.println(e.getMessage()); } finally { ossClient.shutdown(); } return R.ok().put("data" ,respMap); } }
5)gateway网关配置路由
- id: third_party_route
  uri: lb://gulimall-third-party
  predicates:
    - Path=/api/thirdparty/**
  filters:
    - RewritePath=/api/thirdparty/(?<segment>.*),/$\{segment}
6)启动成功测试
拿到对象存储服务端签名数据了
7)前端发请求到后端拿到签名数据后直接post上传文件给阿里云(存在cors问题)
上传组件:放置项目提供的upload文件夹到components目录下,一个是单文件上传,另外一个是多文件上传
PS D:\Project\gulimall\renren-fast-vue\src\components\upload> ls


    目录: D:\Project\gulimall\renren-fast-vue\src\components\upload


Mode                LastWriteTime         Length Name
----                -------------         ------ ----
-a----  2020/4/29 星期三     12:0           3122 multiUpload.vue
                                2
-a----  2019/11/11 星期一     21:            343 policy.js
                               20
-a----  2020/4/29 星期三     12:0           3053 singleUpload.vue
                                1


PS D:\Project\gulimall\renren-fast-vue\src\components\upload>
修改这两个文件的配置后
开始执行上传,但是在上传过程中,出现了如下的问题:
Access to XMLHttpRequest at 'http://gulimall-images.oss-cn-shanghai.aliyuncs.com/' from origin 'http://localhost:8001' has been blocked by CORS policy: Response to preflight request doesn't pass access control check: No 'Access-Control-Allow-Origin' header is present on the requested resource.
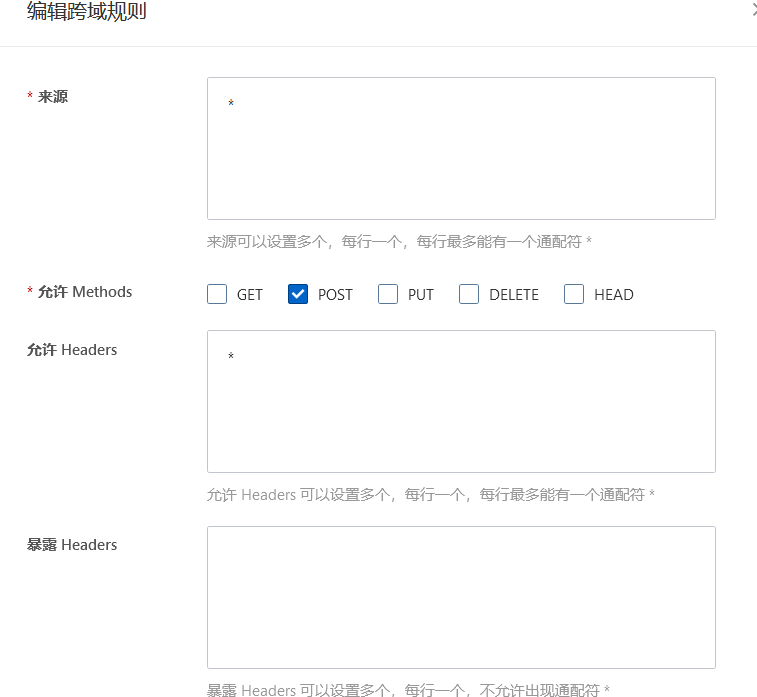
这又是一个跨域的问题,解决方法就是在阿里云上开启跨域访问 数据安全->跨域设置:
再次执行文件上传。
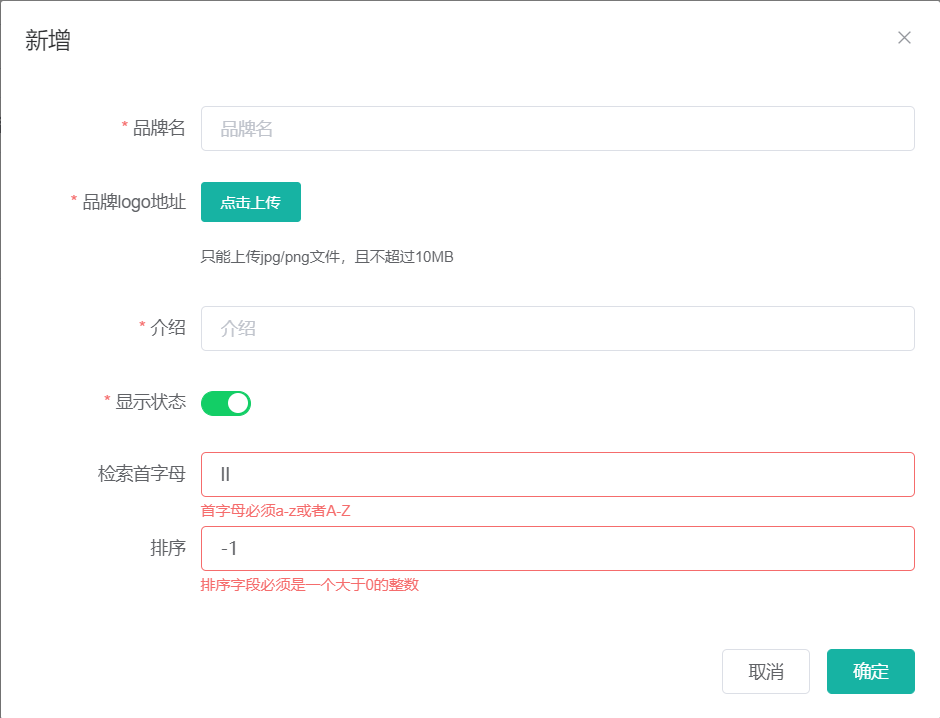
8)前端表单数据校验
使用的是form表单自定义校验
firstLetter: [
          { validator: (rule, value, callback)=>{
            if(value == ''){
              callback(new Error('首字母必须填写'));
            }else if(!/^[a-zA-Z]$/.test(value)){
              callback(new Error('首字母必须a-z或者A-Z'));
            }else{
              callback();
            }
          }, trigger: "blur" },
        ],
        sort: [{ validator: (rule, value, callback)=>{
          if(value == ''){
              callback(new Error('排序字段必须填写'));
            }else if(!Number.isInteger(value) || value < 0){
              callback(new Error('排序字段必须是一个大于0的整数'));
            }else{
              callback();
            }
        }, trigger: "blur" }],
4.4JSR303校验(@Valid注解) 后端也要进行数据校验,因为我如果使用postman发请求就可以跳过前端校验,所以在后端最好也要进行校验。
步骤1:使用校验注解
在Java中提供了一系列的校验方式,它这些校验方式在“javax.validation.constraints”包中,提供了如@Email,@NotNull等注解。
在非空处理方式上提供了@NotNull,@Blank和@
(1)@NotNull:注解元素禁止为null,能够接收任何类型
(2)@NotEmpty:该注解修饰的字段不能为null或””
支持以下几种类型
CharSequence (length of character sequence is evaluated)
字符序列(字符序列长度的计算)
Collection (collection size is evaluated)
Map (map size is evaluated)
Array (array length is evaluated)
(3)@NotBlank
The annotated element must not be null and must contain at least one non-whitespace character. Accepts CharSequence.
步骤2:在请求方法种,使用校验注解@Valid,开启校验,
@RequestMapping("/save") public R save (@Valid @RequestBody BrandEntity brand) { brandService.save(brand); return R.ok(); }
测试: http://localhost:88/api/product/brand/save
在postman种发送上面的请求
{ "timestamp" : "2020-04-29T09:20:46.383+0000" , "status" : 400 , "error" : "Bad Request" , "errors" : [ { "codes" : [ "NotBlank.brandEntity.name" , "NotBlank.name" , "NotBlank.java.lang.String" , "NotBlank" ] , "arguments" : [ { "codes" : [ "brandEntity.name" , "name" ] , "arguments" : null , "defaultMessage" : "name" , "code" : "name" } ] , "defaultMessage" : "不能为空" , "objectName" : "brandEntity" , "field" : "name" , "rejectedValue" : "" , "bindingFailure" : false , "code" : "NotBlank" } ] , "message" : "Validation failed for object='brandEntity'. Error count: 1" , "path" : "/product/brand/save" }
能够看到”defaultMessage”: “不能为空”,这些错误消息定义在“hibernate-validator”的“\org\hibernate\validator\ValidationMessages_zh_CN.properties”文件中。在该文件中定义了很多的错误规则:
javax.validation.constraints.AssertFalse.message     = 只能为false
javax.validation.constraints.AssertTrue.message      = 只能为true
javax.validation.constraints.DecimalMax.message      = 必须小于或等于{value}
javax.validation.constraints.DecimalMin.message      = 必须大于或等于{value}
javax.validation.constraints.Digits.message          = 数字的值超出了允许范围(只允许在{integer}位整数和{fraction}位小数范围内)
javax.validation.constraints.Email.message           = 不是一个合法的电子邮件地址
javax.validation.constraints.Future.message          = 需要是一个将来的时间
javax.validation.constraints.FutureOrPresent.message = 需要是一个将来或现在的时间
javax.validation.constraints.Max.message             = 最大不能超过{value}
javax.validation.constraints.Min.message             = 最小不能小于{value}
javax.validation.constraints.Negative.message        = 必须是负数
javax.validation.constraints.NegativeOrZero.message  = 必须是负数或零
javax.validation.constraints.NotBlank.message        = 不能为空
javax.validation.constraints.NotEmpty.message        = 不能为空
javax.validation.constraints.NotNull.message         = 不能为null
javax.validation.constraints.Null.message            = 必须为null
javax.validation.constraints.Past.message            = 需要是一个过去的时间
javax.validation.constraints.PastOrPresent.message   = 需要是一个过去或现在的时间
javax.validation.constraints.Pattern.message         = 需要匹配正则表达式"{regexp}"
javax.validation.constraints.Positive.message        = 必须是正数
javax.validation.constraints.PositiveOrZero.message  = 必须是正数或零
javax.validation.constraints.Size.message            = 个数必须在{min}和{max}之间

org.hibernate.validator.constraints.CreditCardNumber.message        = 不合法的信用卡号码
org.hibernate.validator.constraints.Currency.message                = 不合法的货币 (必须是{value}其中之一)
org.hibernate.validator.constraints.EAN.message                     = 不合法的{type}条形码
org.hibernate.validator.constraints.Email.message                   = 不是一个合法的电子邮件地址
org.hibernate.validator.constraints.Length.message                  = 长度需要在{min}和{max}之间
org.hibernate.validator.constraints.CodePointLength.message         = 长度需要在{min}和{max}之间
org.hibernate.validator.constraints.LuhnCheck.message               = ${validatedValue}的校验码不合法, Luhn模10校验和不匹配
org.hibernate.validator.constraints.Mod10Check.message              = ${validatedValue}的校验码不合法, 模10校验和不匹配
org.hibernate.validator.constraints.Mod11Check.message              = ${validatedValue}的校验码不合法, 模11校验和不匹配
org.hibernate.validator.constraints.ModCheck.message                = ${validatedValue}的校验码不合法, ${modType}校验和不匹配
org.hibernate.validator.constraints.NotBlank.message                = 不能为空
org.hibernate.validator.constraints.NotEmpty.message                = 不能为空
org.hibernate.validator.constraints.ParametersScriptAssert.message  = 执行脚本表达式"{script}"没有返回期望结果
org.hibernate.validator.constraints.Range.message                   = 需要在{min}和{max}之间
org.hibernate.validator.constraints.SafeHtml.message                = 可能有不安全的HTML内容
org.hibernate.validator.constraints.ScriptAssert.message            = 执行脚本表达式"{script}"没有返回期望结果
org.hibernate.validator.constraints.URL.message                     = 需要是一个合法的URL

org.hibernate.validator.constraints.time.DurationMax.message        = 必须小于${inclusive == true ? '或等于' : ''}${days == 0 ? '' : days += '天'}${hours == 0 ? '' : hours += '小时'}${minutes == 0 ? '' : minutes += '分钟'}${seconds == 0 ? '' : seconds += '秒'}${millis == 0 ? '' : millis += '毫秒'}${nanos == 0 ? '' : nanos += '纳秒'}
org.hibernate.validator.constraints.time.DurationMin.message        = 必须大于${inclusive == true ? '或等于' : ''}${days == 0 ? '' : days += '天'}${hours == 0 ? '' : hours += '小时'}${minutes == 0 ? '' : minutes += '分钟'}${seconds == 0 ? '' : seconds += '秒'}${millis == 0 ? '' : millis += '毫秒'}${nanos == 0 ? '' : nanos += '纳秒'}
想要自定义错误消息,可以覆盖默认的错误提示信息,如@NotBlank的默认message是
public @interface NotBlank { String message () default "{javax.validation.constraints.NotBlank.message}" ;
可以在添加注解的时候,修改message:
@NotBlank(message = "品牌名必须非空")
private String name;
当再次发送请求时,得到的错误提示信息:
{ "timestamp" : "2020-04-29T09:36:04.125+0000" , "status" : 400 , "error" : "Bad Request" , "errors" : [ { "codes" : [ "NotBlank.brandEntity.name" , "NotBlank.name" , "NotBlank.java.lang.String" , "NotBlank" ] , "arguments" : [ { "codes" : [ "brandEntity.name" , "name" ] , "arguments" : null , "defaultMessage" : "name" , "code" : "name" } ] , "defaultMessage" : "品牌名必须非空" , "objectName" : "brandEntity" , "field" : "name" , "rejectedValue" : "" , "bindingFailure" : false , "code" : "NotBlank" } ] , "message" : "Validation failed for object='brandEntity'. Error count: 1" , "path" : "/product/brand/save" }
但是这种返回的错误结果并不符合我们的业务需要。
步骤3:给校验的Bean后,紧跟一个BindResult,就可以获取到校验的结果。拿到校验的结果,就可以自定义的封装。
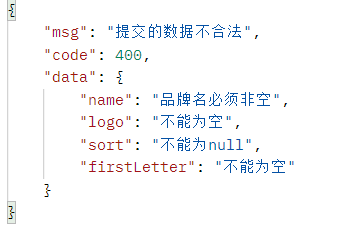
public R save (@Valid @RequestBody BrandEntity brand, BindingResult result) { Map<String ,String> map = new HashMap <>(); if (result.hasErrors()){ result.getFieldErrors().forEach(item->{ String message = item.getDefaultMessage(); String field = item.getField(); map.put(field,message); }); return R.error(400 ,"提交的数据不合法" ).put("data" ,map); }else { brandService.save(brand); } return R.ok(); }
这种是针对于该请求设置了一个内容校验,如果针对于每个请求都单独进行配置,显然不是太合适,实际上可以统一的对于异常进行处理。
步骤4:统一异常处理
可以使用SpringMvc所提供的@ControllerAdvice,通过“basePackages”能够说明处理哪些路径下的异常。也就是原save方法不变发生异常由异常处理类感知并捕获。
(1)抽取一个异常处理类
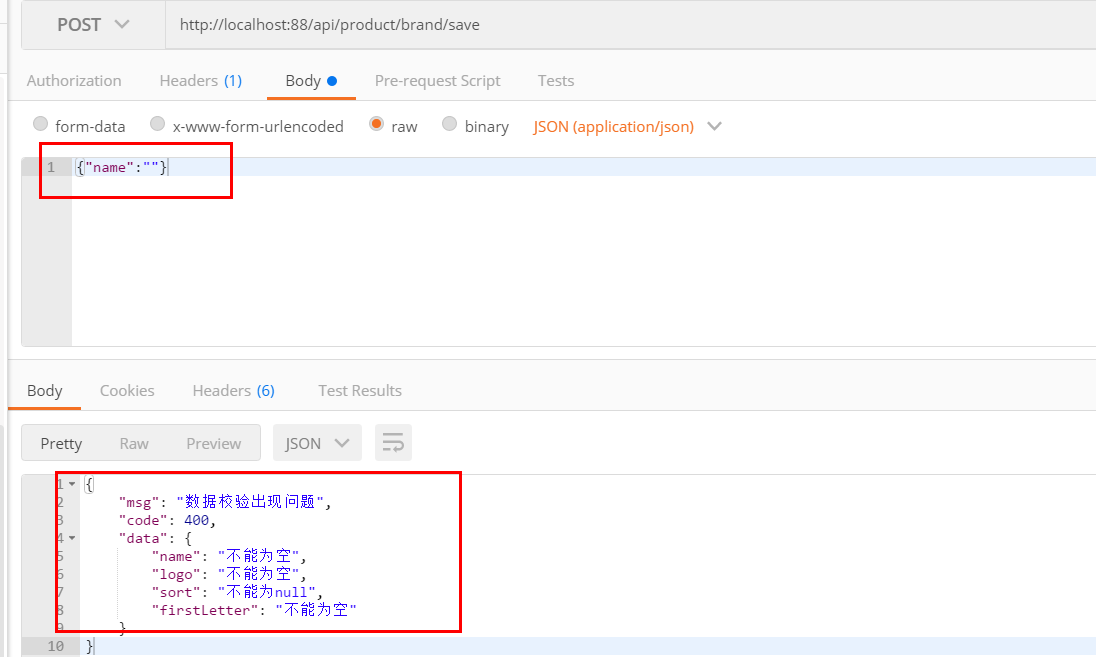
package com.bigdata.gulimall.product.exception;import com.bigdata.common.utils.R;import lombok.extern.slf4j.Slf4j;import org.springframework.validation.BindingResult;import org.springframework.web.bind.MethodArgumentNotValidException;import org.springframework.web.bind.annotation.ControllerAdvice;import org.springframework.web.bind.annotation.ExceptionHandler;import org.springframework.web.bind.annotation.ResponseBody;import org.springframework.web.bind.annotation.RestControllerAdvice;import java.util.HashMap;import java.util.Map;@Slf4j @RestControllerAdvice(basePackages = "com.atguigu.gulimall.product.controller") public class GulimallExceptionControllerAdvice { @ExceptionHandler(value = MethodArgumentNotValidException.class) public R handleValidException (MethodArgumentNotValidException e) { log.error("数据校验出现问题{},异常类型{}" ,e.getMessage(),e.getClass()); BindingResult result = e.getBindingResult(); Map<String ,String> errMap = new HashMap <>(); result.getFieldErrors().forEach(item->{ errMap.put(item.getField(),item.getDefaultMessage()); }); return R.error(BizCodeEnum.VALID_EXCEPTION.getCode(),BizCodeEnum.VALID_EXCEPTION.getMsg()).put("data" ,errMap); } }
(2)测试: http://localhost:88/api/product/brand/save
(3)默认异常处理
@ExceptionHandler(value = Throwable.class) public R handleException (Throwable throwable) { log.error("未知异常{},异常类型{}" ,throwable.getMessage(),throwable.getClass()); return R.error(BizCodeEnum.UNKNOW_EXEPTION.getCode(),BizCodeEnum.UNKNOW_EXEPTION.getMsg()); }
(4)错误状态码
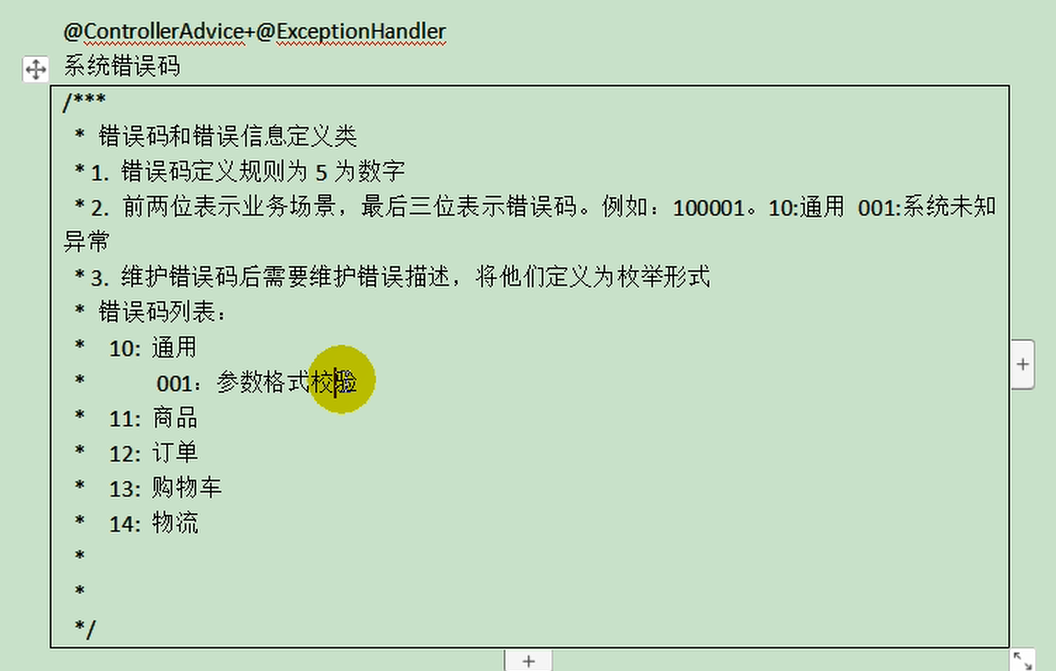
上面代码中,针对于错误状态码,是我们进行随意定义的,然而正规开发过程中,错误状态码有着严格的定义规则,如该在项目中我们的错误状态码定义
为了定义这些错误状态码,我们可以单独定义一个常量类,用来存储这些错误状态码
package com.bigdata.common.exception;public enum BizCodeEnum { UNKNOW_EXEPTION(10000 ,"系统未知异常" ), VALID_EXCEPTION( 10001 ,"参数格式校验失败" ); private int code; private String msg; BizCodeEnum(int code, String msg) { this .code = code; this .msg = msg; } public int getCode () { return code; } public String getMsg () { return msg; } }
(5)测试: http://localhost:88/api/product/brand/save
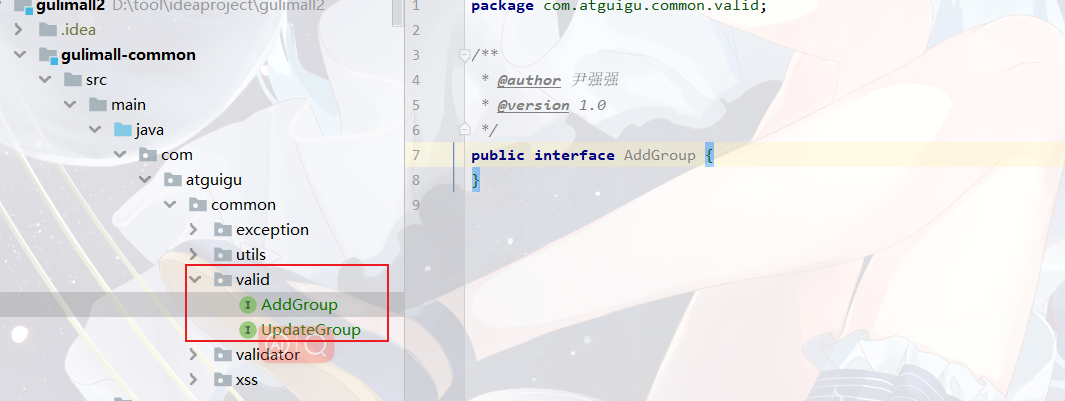
4.4. 分组校验功能(完成多场景的复杂校验@Validated注解) 1、在gulimall-common服务创建校验空接口
2、给校验注解,标注上groups,指定什么情况下才需要进行校验
如:指定在更新和添加的时候,都需要进行校验
@NotEmpty(groups = {AddGroup.class})
@URL(message = "logo必须是一个合法的url地址",groups = {AddGroup.class,UpdateGroup.class})
private String logo;
在这种情况下,没有指定分组的校验注解,默认是不起作用 的。想要起作用就必须要加groups。
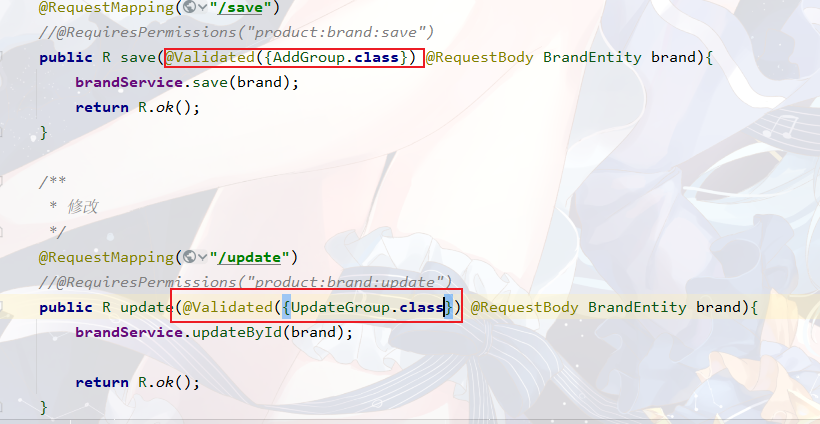
2、业务方法参数上使用@Validated注解
@Validated的value方法:
JSR-303 将验证组定义为自定义注释,应用程序声明的唯一目的是将它们用作类型安全组参数,如 SpringValidatorAdapter 中实现的那样。
其他SmartValidator 实现也可以以其他方式支持类参数。
3、默认情况下,在分组校验情况下,没有指定指定分组的校验注解,将不会生效,它只会在不分组的情况下生效。
4.5. 自定义校验 1、编写一个自定义的校验注解
@Documented @Constraint(validatedBy = { ListValueConstraintValidator.class}) @Target({ METHOD, FIELD, ANNOTATION_TYPE, CONSTRUCTOR, PARAMETER, TYPE_USE }) @Retention(RUNTIME) public @interface ListValue { String message () default "{com.bigdata.common.valid.ListValue.message}" ; Class<?>[] groups() default { }; Class<? extends Payload >[] payload() default { }; int [] value() default {}; }
2、编写一个自定义的校验器
public class ListValueConstraintValidator implements ConstraintValidator <ListValue,Integer> { private Set<Integer> set=new HashSet <>(); @Override public void initialize (ListValue constraintAnnotation) { int [] value = constraintAnnotation.value(); for (int i : value) { set.add(i); } } @Override public boolean isValid (Integer value, ConstraintValidatorContext context) { return set.contains(value); } }
3、编写ValidationMessages.properties
com.atguigu.common.valid.ListValue.message =必须提交指定的值
4、关联自定义的校验器和自定义的校验注解
@Constraint(validatedBy = { ListValueConstraintValidator.class})
5、使用实例
@ListValue(value = {0,1},groups ={AddGroup.class}) private Integer showStatus;
6、postman测试发现乱码(必须重启product服务,改了好多次发现必须重启后服务才能生效)
{ "msg": "参数格式校验失败", "code": 10001, "data": { "logo": "不能为空", "showStatus": "å¿
é¡»æ交æå®çå¼", "sort": "不能为null", "firstLetter": "不能为空" } } setting -> file encoding
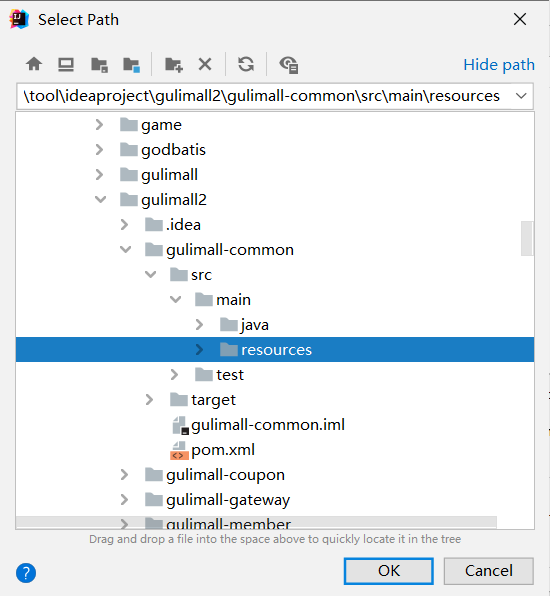
然后添加gulimall-common的resource文件
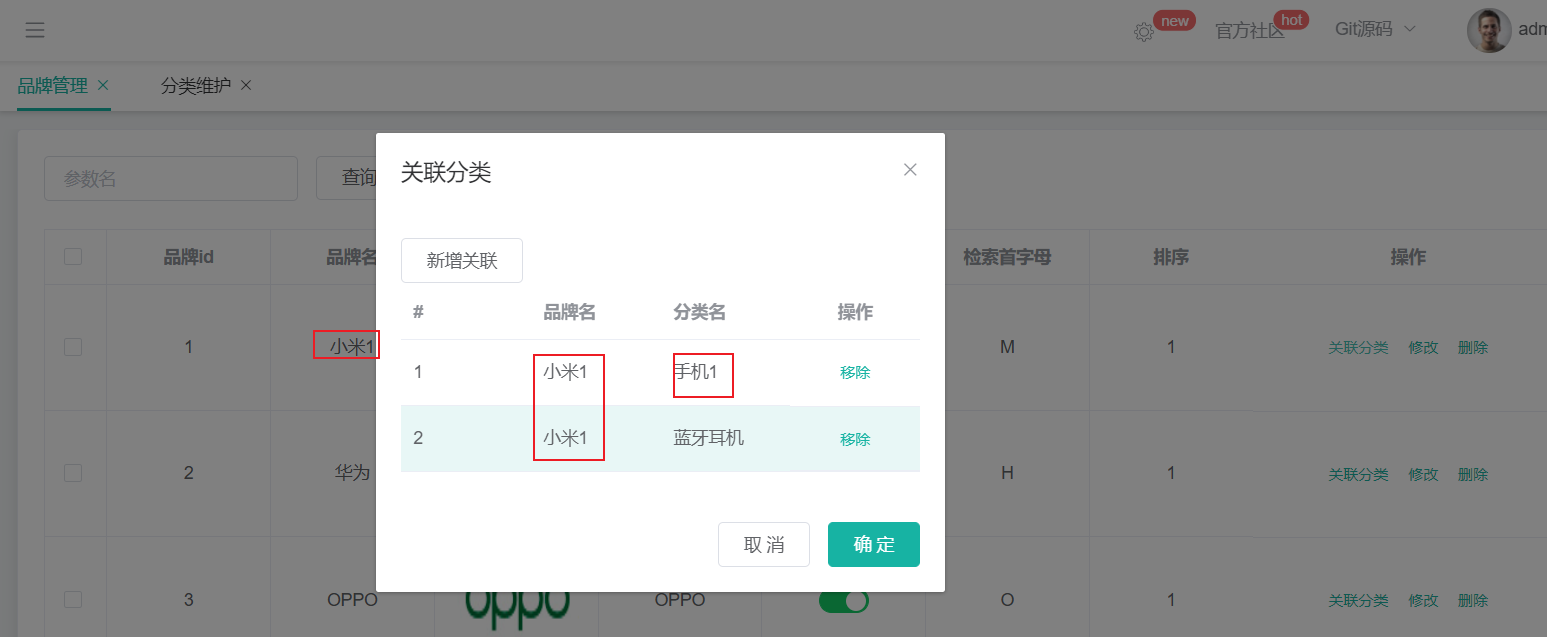
4.6品牌和分类的关联与级联更新 1.品牌和分类的关联
比如小米品牌和分类的关系是多对多(小米不仅可以有手机还有平板,然后手机不仅有小米还有华为等等),那么就需要维护一张关系表pms_category_brand_relation。
@GetMapping("/catelog/list") public R categoylist (@RequestParam("brandId") Long brandId) { List<CategoryBrandRelationEntity> data = categoryBrandRelationService.list(new QueryWrapper <CategoryBrandRelationEntity>().eq("brand_id" , brandId)); return R.ok().put("data" , data); } @RequestMapping("/save") public R save (@RequestBody CategoryBrandRelationEntity categoryBrandRelation) { categoryBrandRelationService.saveDetail(categoryBrandRelation); return R.ok(); }
public void saveDetail (CategoryBrandRelationEntity categoryBrandRelation) { Long brandId = categoryBrandRelation.getBrandId(); Long catelogId = categoryBrandRelation.getCatelogId(); CategoryEntity categoryEntity = categoryDao.selectById(catelogId); BrandEntity brandEntity = brandDao.selectById(brandId); categoryBrandRelation.setBrandName(brandEntity.getName()); categoryBrandRelation.setCatelogName(categoryEntity.getName()); this .save(categoryBrandRelation); }
2.级联更新
1.修改BrandController的Update
@RequestMapping("/update") public R update (@Validated({UpdateGroup.class}) @RequestBody BrandEntity brand) { brandService.updateDetail(brand); return R.ok(); }
2.新增brandserviceImpl方法
public void updateDetail (BrandEntity brand) { this .updateById(brand); if (!StringUtils.isEmpty(brand.getName())){ categoryBrandRelationService.updateBrand(brand.getBrandId(),brand.getName()); } }
3.修改CategoryController的Update
@RequestMapping("/update") public R update (@RequestBody CategoryEntity category) { categoryService.updateCascade(category); return R.ok(); }
4.新增CategoryServiceImpl的updateCascade方法
@Override public void updateCascade (CategoryEntity category) { this .updateById(category); if (!StringUtils.isEmpty(category.getName())){ categoryBrandRelationService.updateCategory(category.getCatId(),category.getName()); } }
5.新增CategoryBrandRelationServiceImpl修改品牌和修改分类方法
@Override public void updateBrand (Long brandId, String name) { CategoryBrandRelationEntity categoryBrandRelationEntity = new CategoryBrandRelationEntity (); categoryBrandRelationEntity.setBrandId(brandId); categoryBrandRelationEntity.setBrandName(name); System.out.println("categoryBrandRelationEntity" +categoryBrandRelationEntity); this .update(categoryBrandRelationEntity,new UpdateWrapper <CategoryBrandRelationEntity>().eq("brand_id" ,brandId)); } @Override public void updateCategory (Long catId, String name) { this .baseMapper.updateCategory(catId,name); }
6.效果:修改品牌名和分类名级联修改
5.平台属性—属性分组 5.1. 点击子组件,父组件触发事件 现在想要实现点击菜单的左边,能够实现在右边展示数据
父子组件传递数据:
1)子组件给父组件传递数据,事件机制;
在category中绑定node-click事件,
<el-tree :data="menus" :props="defaultProps" node-key="catId" ref="menuTree" @node-click="nodeClick" ></el-tree>
2)子组件给父组件发送一个事件,携带上数据;
nodeClick (data,Node,component ){ console .log ("子组件" ,data,Node ,component); this .$emit("tree-node-click" ,data,Node ,component); },
this.$emit(事件名,”携带的数据”);
3)父组件中的获取发送的事件
<category @tree-node-click="treeNodeClick"></category>
treeNodeClick (data,Node,component ){ console .log ("attgroup感知到的category的节点被点击" ,data,Node ,component); console .log ("刚才被点击的菜单ID" ,data.catId ); },
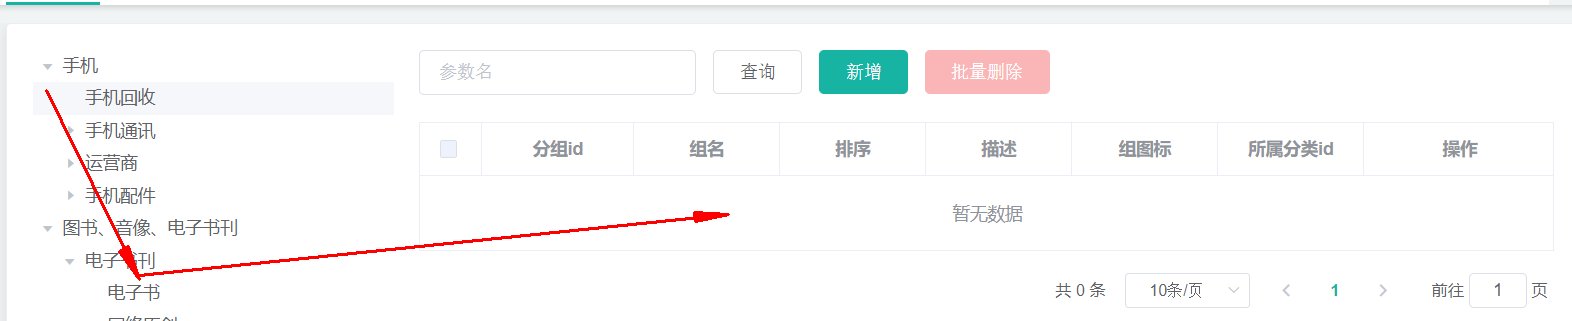
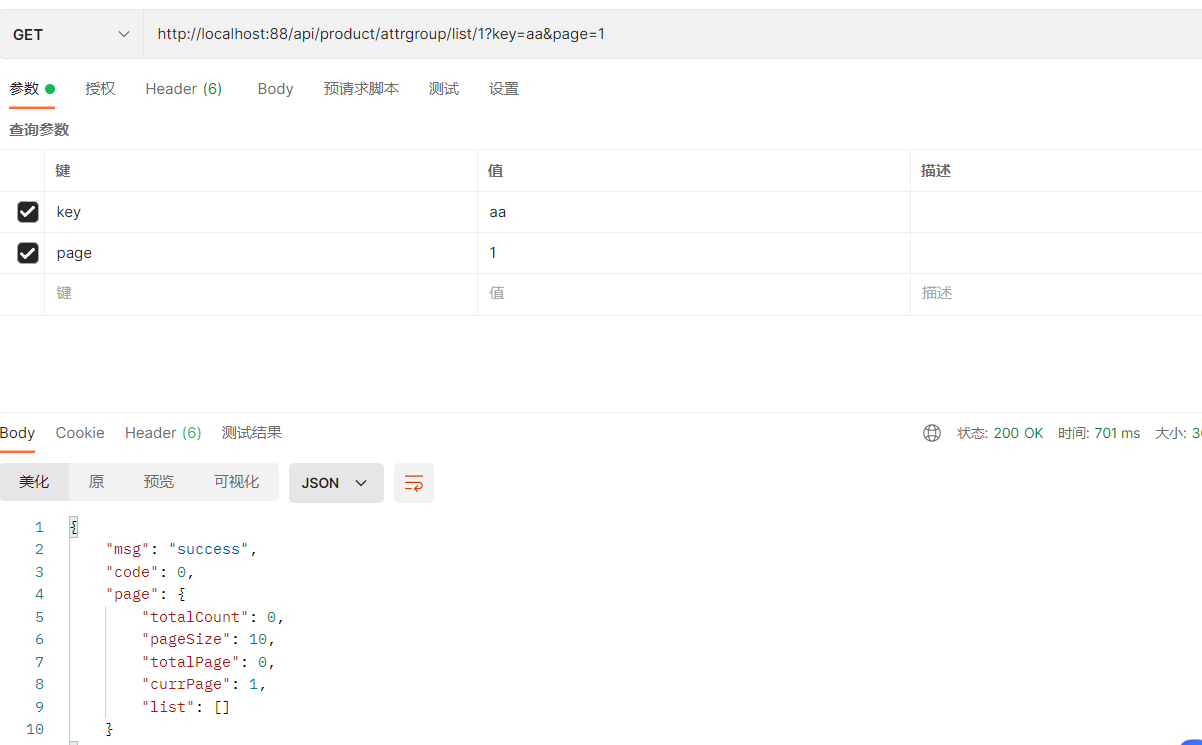
5.2分组查询 1.AttrGroupController修改新增为携带catelogId
@RequestMapping("/list/{catelogId}") public R list (@RequestParam Map<String, Object> params, @PathVariable("catelogId") Long catelogId) { PageUtils page = attrGroupService.queryPage(params,catelogId); return R.ok().put("page" , page); }
2.service层实现类添加方法
@Override public PageUtils queryPage (Map<String, Object> params, Long catelogId) { if (catelogId == 0 ){ IPage<AttrGroupEntity> page = this .page( new Query <AttrGroupEntity>().getPage(params), new QueryWrapper <AttrGroupEntity>() ); return new PageUtils (page); }else { String key = (String) params.get("key" ); QueryWrapper<AttrGroupEntity> wrapper = new QueryWrapper <AttrGroupEntity>().eq("catelog_id" ,catelogId); if (!StringUtils.isBlank(key)){ wrapper.and((obj)->{ obj.eq("attr_group_id" ,key).or().like("attr_group_name" ,key); }); } IPage<AttrGroupEntity> page = this .page(new Query <AttrGroupEntity>().getPage(params), wrapper); return new PageUtils (page); } }
3.测试
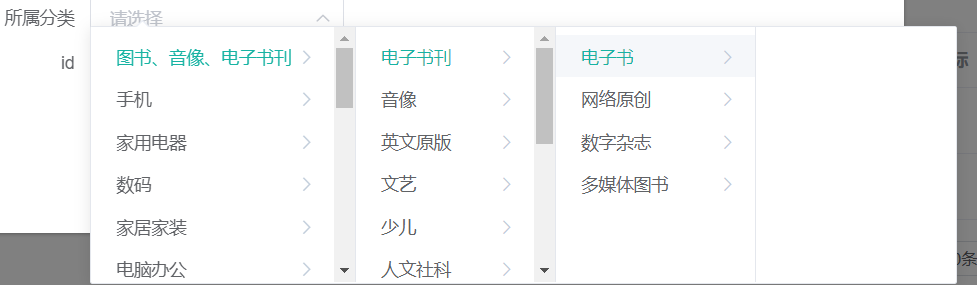
5.3分组新增和级联选择器 1.新增时如果想要出现级联效果attrgroup-add-or-update.vue
 <el-form-item label="所属分类id" prop="catelogId">
        <!-- <el-input v-model="dataForm.catelogId" placeholder="所属分类id"></el-input> -->
        <el-cascader
          v-model="dataForm.catelogId"
          :options="categorys"
          @change="handleChange"
          :props="props"
        ></el-cascader>
      </el-form-item>
return {
      props:{
        value:"catId",
        label:"name",
        children:"children"
      },
	categorys: []//存放分类获取到的数据
}
getCategorys(){
      this.$http({
        url: this.$http.adornUrl("/product/category/list/tree"),
        method: "get",
      }).then(({ data }) => {
        console.log("成功获取到菜单数据", data.tree);
        this.categorys = data.tree;
      });
    },
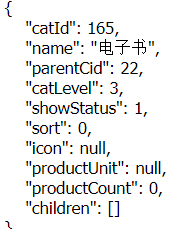
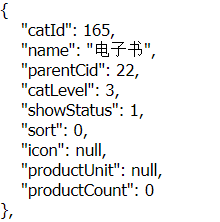
2.但是分类多出了一列,可知后端返回的children有空列。
3.修改后端代码加入注解@JsonInclude
@JsonInclude(JsonInclude.Include.NON_EMPTY) @TableField(exist = false) private List<CategoryEntity> children;
可知children空数组没有响应给前端了
5.4分组修改和级联选择器回显 点击修改时所属分类不回显
原因:
可知后端返回数据只有catelogId:225,所以不会回显。
解决:
在attrgroup-add-or-update.vue的 init(id)方法回显数据时查出catelgId完整路径
1.AttrGroupEntity添加catelogPath属性
@TableField(exist = false)
private Long[] catelogPath;
2.AttrGroupController.java修改返回数据将全路径返回
@RequestMapping("/info/{attrGroupId}") public R info (@PathVariable("attrGroupId") Long attrGroupId) { AttrGroupEntity attrGroup = attrGroupService.getById(attrGroupId); Long catelogId = attrGroup.getCatelogId(); Long[] path = categoryService.findCategoryPath(catelogId); attrGroup.setCatelogPath(path); return R.ok().put("attrGroup" , attrGroup); }
3.实现逻辑CategoryServiceImpl.java
@Override public Long[] findCategoryPath(Long catelogId) { List<Long> paths = new ArrayList <>(); List<Long> parentPath = findParentPath(catelogId, paths); Collections.reverse(parentPath); return (Long[]) parentPath.toArray(new Long [parentPath.size()]); } private List<Long> findParentPath (Long catelogId, List<Long> paths) { paths.add(catelogId); CategoryEntity category = this .getById(catelogId); if (category.getParentCid() != 0 ){ findParentPath(category.getParentCid(),paths); } return paths; }
4.前端init方法
this.dataForm.catelogPath = data.attrGroup.catelogPath;
6.平台属性—基本属性/规格参数和销售属性 规格参数新增时,请求的URL:Request URL:
http://localhost:88/api/product/attr/base/list/0?t=1588731762158&page=1&limit=10&key=
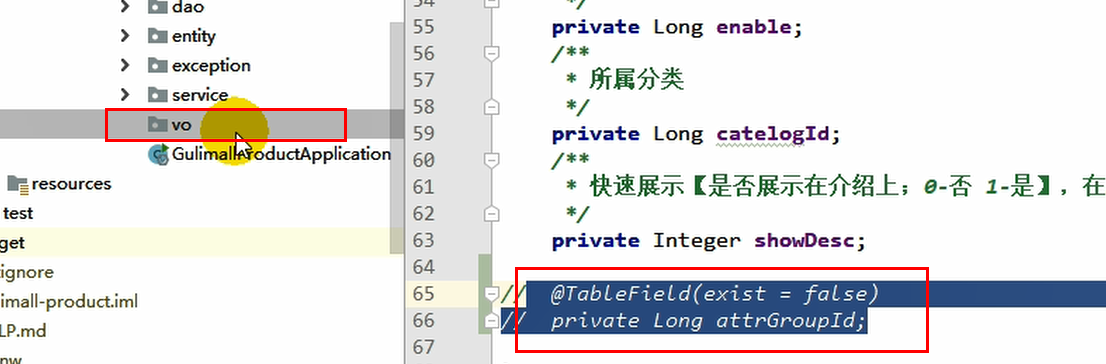
当有新增字段时,我们往往会在entity实体类中新建一个字段,并标注数据库中不存在该字段,然而这种方式并不规范
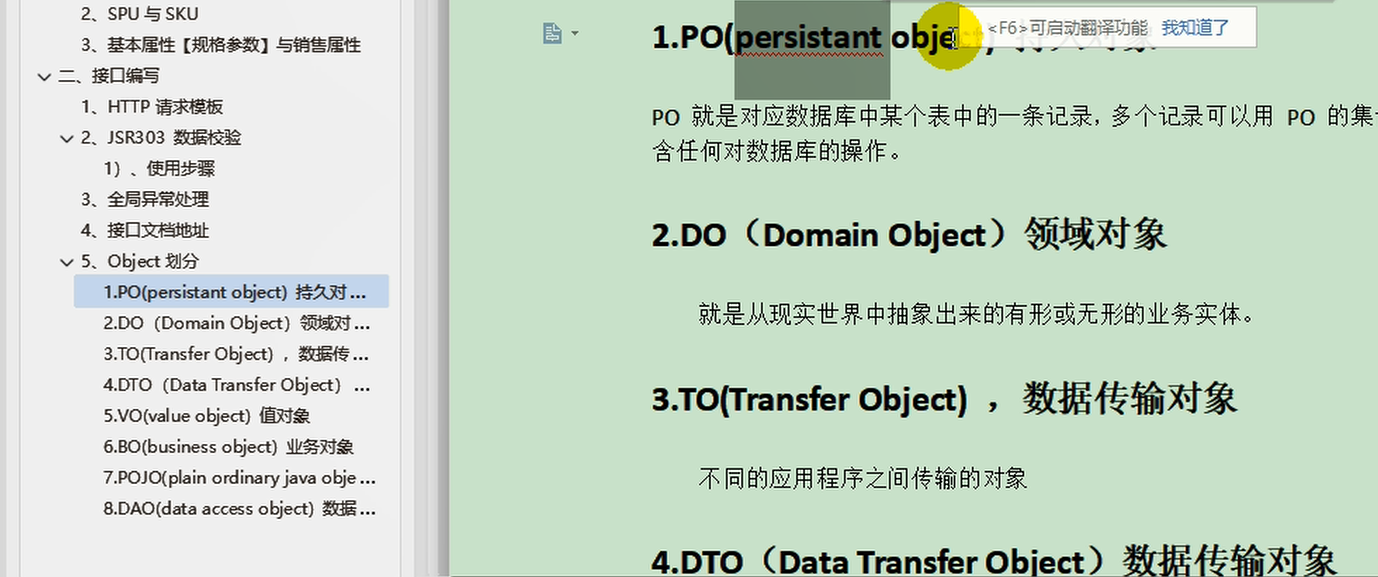
比较规范的做法是,新建一个vo文件夹,将每种不同的对象,按照它的功能进行了划分。在java中,涉及到了这几种类型
6.1新增属性 常量
public class ProductConstant { public enum AttrEnum { ATTR_TYPE_BASE(1 ,"基本属性" ),ATTR_TYPE_SALE(0 ,"销售属性" ); AttrEnum(int code,String msg){ this .code = code; this .msg = msg; } private int code; private String msg; public int getCode () { return code; } public String getMsg () { return msg; } } }
Request URL: http://localhost:88/api/product/attr/save,现在的情况是,它在保存的时候,只是保存了attr,并没有保存attrgroup,为了解决这个问题,我们新建了一个vo/AttrVo,在原AttrEntity基础上增加了attrGroupId字段,使得保存新增数据的时候,也保存了它们之间的关系。
通过” BeanUtils.copyProperties(attr,attrEntity);”能够实现在两个Bean之间拷贝数据,但是两个Bean的字段要相同
@Override public void saveAttr (AttrVo attr) { AttrEntity attrEntity = new AttrEntity (); BeanUtils.copyProperties(attr,attrEntity); this .save(attrEntity); }
AttrServiceImpl类
@Transactional @Override public void saveAttr (AttrVo attrVo) { AttrEntity attrEntity = new AttrEntity (); BeanUtils.copyProperties(attrVo,attrEntity); this .save(attrEntity); if (attrVo.getAttrType() == ProductConstant.AttrEnum.ATTR_TYPE_BASE.getCode() && attrVo.getAttrGroupId() != null ){ AttrAttrgroupRelationEntity relationEntity = new AttrAttrgroupRelationEntity (); relationEntity.setAttrId(attrEntity.getAttrId()); relationEntity.setAttrGroupId(attrVo.getAttrGroupId()); attrAttrgroupRelationService.save(relationEntity); } }
问题:现在有两个查询,一个是查询部分,另外一个是查询全部,但是又必须这样来做吗?还是有必要的,但是可以在后台进行设计,两种查询是根据catId是否为零进行区分的。
6.2查询属性(基本属性和销售属性)、分组和分类名字 查询前端响应会多出两个字段
@Data public class AttrRespVo extends AttrVo { private String catelogName; private String groupName; }
AttrController类
@GetMapping("/base/list/{catelogId}") public R baseAttrList (@RequestParam Map<String ,Object> params, @PathVariable Long catelogId) { PageUtils page = attrService.queryBasePage(params,catelogId); return R.ok().put("page" ,page); } @GetMapping("/{attrType}/list/{catelogId}") public R baseAttrList (@RequestParam Map<String ,Object> params, @PathVariable("catelogId") Long catelogId, @PathVariable("attrType") String attrType) { PageUtils page = attrService.queryBasePage(params,catelogId,attrType); return R.ok().put("page" ,page); }
AttrServiceImpl类
public PageUtils queryBasePage (Map<String, Object> params, Long catelogId) { QueryWrapper<AttrEntity> wrapper = new QueryWrapper <AttrEntity>().eq("attr_type" ,"base" .equalsIgnoreCase(attrType)?ProductConstant.AttrEnum.ATTR_TYPE_BASE.getCode():ProductConstant.AttrEnum.ATTR_TYPE_SALE.getCode()); if (catelogId != 0 ){ wrapper.eq("catelog_id" ,catelogId); } String key = (String) params.get("key" ); if (!StringUtils.isEmpty(key)){ wrapper.and((queryWrapper)->{ queryWrapper.eq("attr_id" ,key) .or().like("attr_name" ,key); }); } IPage<AttrEntity> page = this .page(new Query <AttrEntity>().getPage(params), wrapper); PageUtils pageUtils = new PageUtils (page); List<AttrEntity> records = page.getRecords(); List<AttrRespVo> respVoList = records.stream().map((attrEntity -> { AttrRespVo attrRespVo = new AttrRespVo (); BeanUtils.copyProperties(attrEntity, attrRespVo); CategoryEntity categoryEntity = categoryDao.selectById(attrEntity.getCatelogId()); if (categoryEntity != null ) { String categoryName = categoryEntity.getName(); System.out.println("---->" +categoryEntity.getName()); attrRespVo.setCatelogName(categoryName); } if ("base" .equalsIgnoreCase(attrType)){ AttrAttrgroupRelationEntity relationEntity = relationDao.selectOne(new QueryWrapper <AttrAttrgroupRelationEntity>().eq("attr_id" , attrEntity.getAttrId())); if (relationEntity != null && relationEntity.getAttrGroupId() != null ) { AttrGroupEntity attrGroupEntity = attrGroupDao.selectById(relationEntity.getAttrGroupId()); attrRespVo.setGroupName(attrGroupEntity.getAttrGroupName()); } } return attrRespVo; })).collect(Collectors.toList()); pageUtils.setList(respVoList); return pageUtils; }
6.3修改 6.3.1.回显路径完整 在回显时要回显分类的完整路径如:【手机/手机通讯/手机】
GET请求:/product/attr/info/{attrId}
1.AttrRespVo类新增,完整路径属性
@Data public class AttrRespVo extends AttrVo { private String catelogName; private String groupName; private Long[] catelogPath; }
2.修改controller代码
@RequestMapping("/info/{attrId}") public R info (@PathVariable("attrId") Long attrId) { AttrRespVo attrRespVo = attrService.getAttrInfo(attrId); return R.ok().put("attr" , attrRespVo); }
3.修改业务层代码
@Transactional @Override public AttrRespVo getAttrInfo (Long attrId) { AttrRespVo attrRespVo = new AttrRespVo (); AttrEntity attrEntity = this .getById(attrId); BeanUtils.copyProperties(attrEntity,attrRespVo); if (attrEntity.getAttrType() == ProductConstant.AttrEnum.ATTR_TYPE_BASE.getCode()){ AttrAttrgroupRelationEntity relationEntity = relationDao.selectOne(new QueryWrapper <AttrAttrgroupRelationEntity>().eq("attr_id" , attrEntity.getAttrId())); if (relationEntity != null ){ attrRespVo.setAttrGroupId(relationEntity.getAttrGroupId()); AttrGroupEntity attrGroupEntity = attrGroupDao.selectById(relationEntity.getAttrGroupId()); if (attrGroupEntity != null ){ attrRespVo.setGroupName(attrGroupEntity.getAttrGroupName()); } } } Long catelogId = attrEntity.getCatelogId(); Long[] categoryPath = categoryService.findCategoryPath(catelogId); attrRespVo.setCatelogPath(categoryPath); CategoryEntity categoryEntity = categoryDao.selectById(catelogId); if (categoryEntity != null ){ attrRespVo.setCatelogName(categoryEntity.getName()); } return attrRespVo; }
6.3.2修改确认 @RequestMapping("/update") public R update (@RequestBody AttrVo attrVo) { attrService.updateAttr(attrVo); return R.ok(); }
@Transactional @Override public void updateAttr (AttrVo attrVo) { AttrEntity attrEntity = new AttrEntity (); BeanUtils.copyProperties(attrVo,attrEntity); this .updateById(attrEntity); if (attrVo.getAttrType() == ProductConstant.AttrEnum.ATTR_TYPE_BASE.getCode()){ AttrAttrgroupRelationEntity attrAttrgroupRelationEntity = new AttrAttrgroupRelationEntity (); attrAttrgroupRelationEntity.setAttrGroupId(attrVo.getAttrGroupId()); attrAttrgroupRelationEntity.setAttrId(attrVo.getAttrId()); Integer count = relationDao.selectCount(new QueryWrapper <AttrAttrgroupRelationEntity>().eq("attr_id" , attrVo.getAttrId())); if (count > 0 ){ relationDao.update(attrAttrgroupRelationEntity,new UpdateWrapper <AttrAttrgroupRelationEntity>().eq("attr_id" ,attrVo.getAttrId())); }else { relationDao.insert(attrAttrgroupRelationEntity); } } }
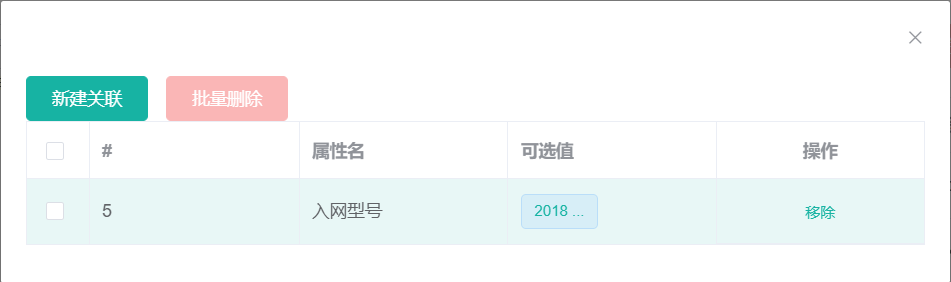
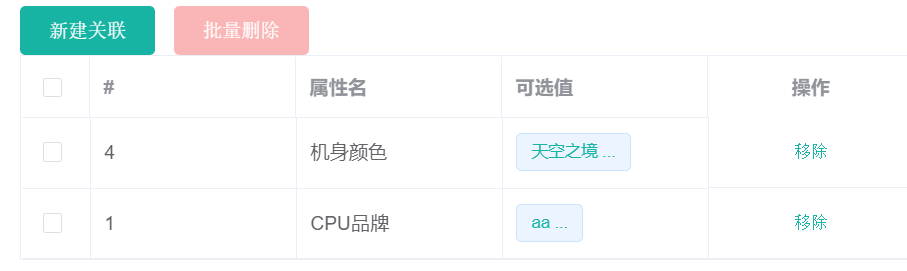
7、平台属性—-查询分组关联属性和删除关联
7.1查询分组关联属性 API:https://easydoc.net/s/78237135/ZUqEdvA4/LnjzZHPj
发送请求:/product/attrgroup/{attrgroupId}/attr/relation
如何查找:既然给出了attr_group_id,那么到中间表中查询出来所关联的attr_id,然后得到最终的所有属性即可。
可能出现null值的问题
AttrGroupController
@GetMapping("/{attrgroupId}/attr/relation") public R attrRelation (@PathVariable("attrgroupId") Long attrgroupId) { List<AttrEntity> entities = attrService.getRelationAttr(attrgroupId); return R.ok().put("data" ,entities); }
AttrServiceImpl.java
@Override public List<AttrEntity> getRelationAttr (Long attrgroupId) { List<AttrAttrgroupRelationEntity> relationEntities = relationDao.selectList(new QueryWrapper <AttrAttrgroupRelationEntity>().eq("attr_group_id" , attrgroupId)); List<Long> attrIds = relationEntities.stream().map(attrRelation -> { return attrRelation.getAttrId(); }).collect(Collectors.toList()); if (attrIds == null || attrIds.size() == 0 ){ return null ; } Collection<AttrEntity> attrEntities = this .listByIds(attrIds); return (List<AttrEntity>) attrEntities; }
查询成功
7.2删除关联 API:https://easydoc.net/s/78237135/ZUqEdvA4/qn7A2Fht
POST:/product/attrgroup/attr/relation/delete
@PostMapping("/attr/relation/delete") public R deleteRelation (AttrGroupRelationVo[] vos) { attrService.deleteRelation(vos); return R.ok(); }
service
@Override public void deleteRelation (AttrGroupRelationVo[] vos) { List<AttrAttrgroupRelationEntity> entities = Arrays.stream(vos).map(item -> { AttrAttrgroupRelationEntity relationEntity = new AttrAttrgroupRelationEntity (); BeanUtils.copyProperties(item, relationEntity); return relationEntity; }).collect(Collectors.toList()); relationDao.deleteBatchRelation(entities); }
dao和mapper.xml
@Mapper public interface AttrAttrgroupRelationDao extends BaseMapper <AttrAttrgroupRelationEntity> { void deleteBatchRelation (@Param("entities") List<AttrAttrgroupRelationEntity> entities) ; }
<delete id ="deleteBatchRelation" > DELETE from pms_attr_attrgroup_relation WHERE <foreach collection ="entities" item ="item" separator ="OR" > (attr_id = #{item.attrId} AND attr_group_id = #{item.attrGroupId}) </foreach > </delete >
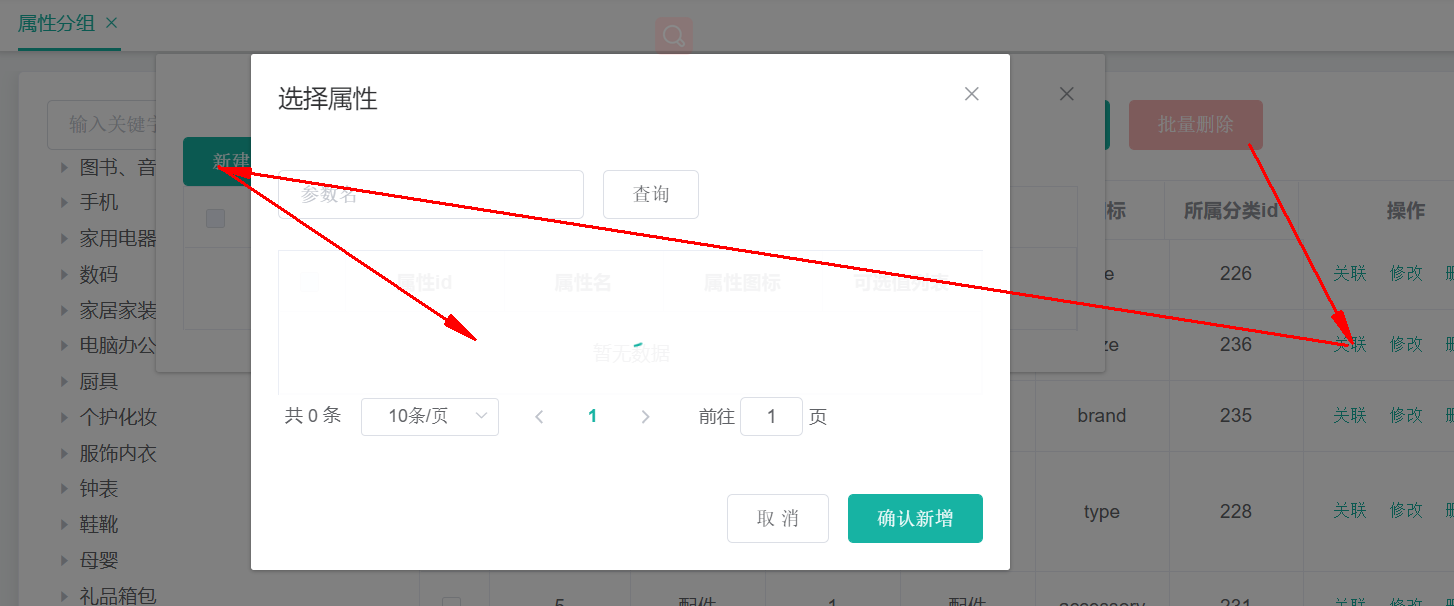
7.3. 查询分组未关联的属性 /product/attrgroup/{attrgroupId}/noattr/relation
API:https://easydoc.xyz/doc/75716633/ZUqEdvA4/d3EezLdO
获取属性分组里面还没有关联的本分类里面的其他基本属性,方便添加新的关联
Request URL: http://localhost:88/api/product/attrgroup/1/noattr/relation?t=1588780783441&page=1&limit=10&key=
属性分组,对应于“pms_attr_group”表,每个分组下,需要查看到关联了哪些属性信息,销售属性不需要和分组进行关联,但是规格参数要和属性分组进行关联。
规格参数:对应于pms_attr表,attr_type=1,需要显示分组信息
销售属性:对应于pms_attr`表,attr_type=0,不需要显示分组信息
分组ID为9的分组:Request URL: http://localhost:88/api/product/attrgroup/9/noattr/relation?t=1588822258669&page=1&limit=10&key=
对应的数据库字段
attr_group_id attr_group_name sort descript icon catelog_id
        9  主体                    1  型号 平台                   wu               454
       10  显卡                    1  显存容量                    wu               454
       11  输入设备                  1  鼠标 键盘                   wu               454
       12  主板                    1  显卡类型 芯片组                wu               454
       13  规格                    1  尺寸                      wu               454
查询attrgroupId=9的属性分组:
AttrGroupEntity attrGroupEntity = attrGroupDao.selectById(attrgroupId);
获取到分类信息:
Long catelogId = attrGroupEntity.getCatelogId();
目标:获取属性分组没有关联的其他属性
也就是获取attrgroupId=9的属性分组中,关联的分类catelog_id =454 (台式机),其他基本属性
在该属性分组中,现在已经关联的属性:
本分类下,存在哪些基本属性?
没有关联的其他属性
已经关联的属性,这些属性是如何关联上的?
答:在创建规格参数的时候,已经设置了需要关联哪些属性分组。
想要知道还没有关联哪些,先查看关联了哪些,如何排除掉这些就是未关联的
在中间表中显示了属性和属性分组之间的关联关系,在属性表中显示了所有的属性,
先查询中间表,得到所有已经关联的属性的id,然后再次查询属性表,排除掉已经建立关联的属性ID,将剩下的属性ID和属性建立起关联关系
public PageUtils getNoRelationAttr (Map<String, Object> params, Long attrgroupId) { AttrGroupEntity attrGroupEntity = attrGroupDao.selectById(attrgroupId); Long catelogId = attrGroupEntity.getCatelogId(); List<AttrGroupEntity> groups = attrGroupDao.selectList(new QueryWrapper <AttrGroupEntity>().eq("catelog_id" , catelogId)); List<Long> list = groups.stream().map(item -> { return item.getAttrGroupId(); }).collect(Collectors.toList()); List<AttrAttrgroupRelationEntity> groupId = relationDao.selectList(new QueryWrapper <AttrAttrgroupRelationEntity>().in("attr_group_id" , list)); List<Long> attrIds = groupId.stream().map(item -> { return item.getAttrId(); }).collect(Collectors.toList()); QueryWrapper<AttrEntity> queryWrapper = new QueryWrapper <AttrEntity>().eq("catelog_id" , catelogId).eq("attr_type" ,ProductConstant.AttrEnum.ATTR_TYPE_BASE.getCode()); if (attrIds != null && attrIds.size() > 0 ){ queryWrapper.notIn("attr_id" , attrIds); } String key = (String) params.get("key" ); if (!StringUtils.isEmpty(key)){ queryWrapper.and((w)->{ w.eq("attr_id" ,key).or().like("attr_name" ,key); }); } IPage<AttrEntity> page = this .page(new Query <AttrEntity>().getPage(params), queryWrapper); PageUtils pageUtils = new PageUtils (page); return pageUtils; }
7.4新增分组与属性关联 POST: /product/attrgroup/attr/relation
@PostMapping("/attr/relation") public R addRelation (@RequestBody List<AttrGroupRelationVo> vos) { relationService.saveBatch(vos); return R.ok(); }
public void saveBatch (List<AttrGroupRelationVo> vos) { List<AttrAttrgroupRelationEntity> collect = vos.stream().map(item -> { AttrAttrgroupRelationEntity attrAttrgroupRelationEntity = new AttrAttrgroupRelationEntity (); BeanUtils.copyProperties(item, attrAttrgroupRelationEntity); return attrAttrgroupRelationEntity; }).collect(Collectors.toList()); this .saveBatch(collect); }
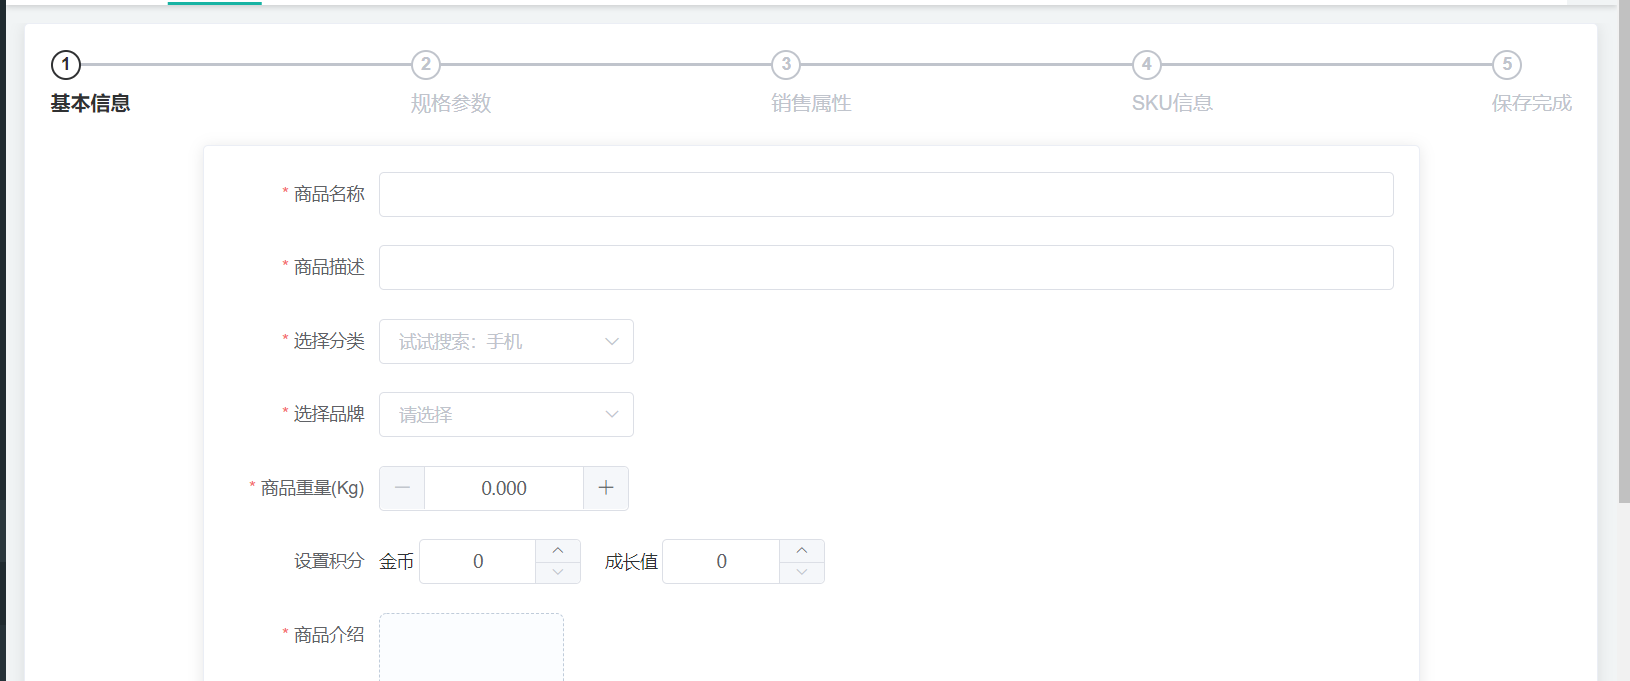
8. 发布商品 要走完以下所有流程才可以发布商品
8.1.获取所有会员等级: /member/memberlevel/list
API:https://easydoc.net/doc/75716633/ZUqEdvA4/jCFganpf
在“gulimall-gateway”中修改“”文件,添加对于member的路由
- id: gulimall-member
  uri: lb://gulimall-member
  predicates:
    - Path=/api/member/**
  filters:
    - RewritePath=/api/(?<segment>/?.*),/$\{segment}
在“gulimall-member”中,创建“bootstrap.properties”文件,内容如下:
spring.cloud.nacos.config.name =gulimall-member spring.cloud.nacos.config.server-addr =192.168.137.14:8848 spring.cloud.nacos.config.namespace =795521fa-77ef-411e-a8d8-0889fdfe6964 spring.cloud.nacos.config.extension-configs[0].data-id =gulimall-member.yml spring.cloud.nacos.config.extension-configs[0].group =DEFAULT_GROUP spring.cloud.nacos.config.extension-configs[0].refresh =true
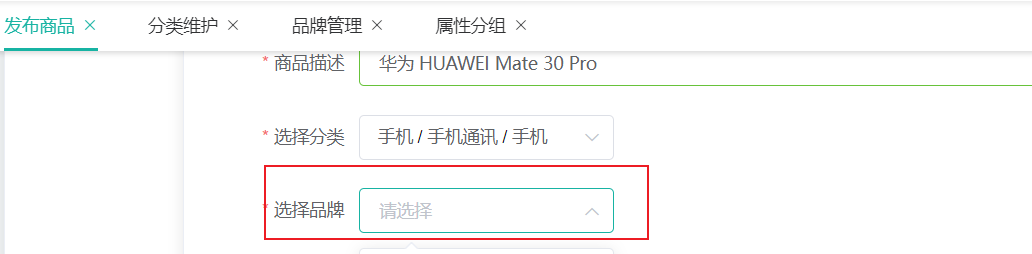
8.2获取分类关联的品牌: /product/categorybrandrelation/brands/list
API:https://easydoc.net/doc/75716633/ZUqEdvA4/HgVjlzWV
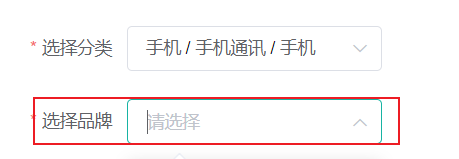
当我填写信息时没有显示分类对应的品牌,如下图:
CategoryBrandRelationController类 @GetMapping("/brands/list") public R RelationBrandsList (@RequestParam("catId") Long catId) { List<BrandEntity> vos = categoryBrandRelationService.getBrandsByCatId(catId); List<BrandVo> collect = vos.stream().map(item -> { BrandVo brandVo = new BrandVo (); brandVo.setBrandId(item.getBrandId()); brandVo.setBrandName(item.getName()); return brandVo; }).collect(Collectors.toList()); return R.ok().put("data" ,collect); }
@Autowired @Lazy BrandService brandService; @Override public List<BrandEntity> getBrandsByCatId (Long catId) { List<CategoryBrandRelationEntity> catelogId = this .baseMapper.selectList(new QueryWrapper <CategoryBrandRelationEntity>().eq("catelog_id" , catId)); List<BrandEntity> collect = catelogId.stream().map(item -> { Long brandId = item.getBrandId(); BrandEntity brandEntity = brandService.getById(brandId); return brandEntity; }).collect(Collectors.toList()); return collect; }
前端没有发送获取品牌的请求:
network没有请求
解决:
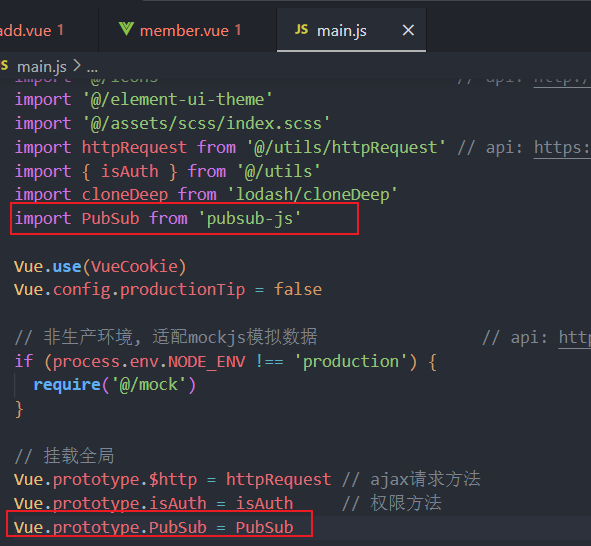
首先安装pubsub-js
`npm install --save pubsub-js`
订阅方组件
`import PubSub from 'pubsub-js'`
该this.PubSub为PubSub。
main.js文件
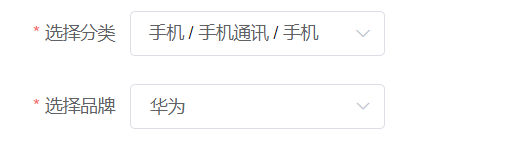
成功获取到了
获取分类下所有分组&关联属性
请求类型:/product/attrgroup/{catelogId}/withattr
请求方式:GET
请求URL:http://localhost:88/api/product/attrgroup/225/withattr?t=1588864569478
mysql默认的隔离级别为读已提交,为了能够在调试过程中,获取到数据库中的数据信息,可以调整隔离级别为读未提交:
SET SESSION TRANSACTION ISOLATION LEVEL READ UNCOMMITTED;
但是它对于当前的事务窗口生效,如果想要设置全局的,需要加上global字段。
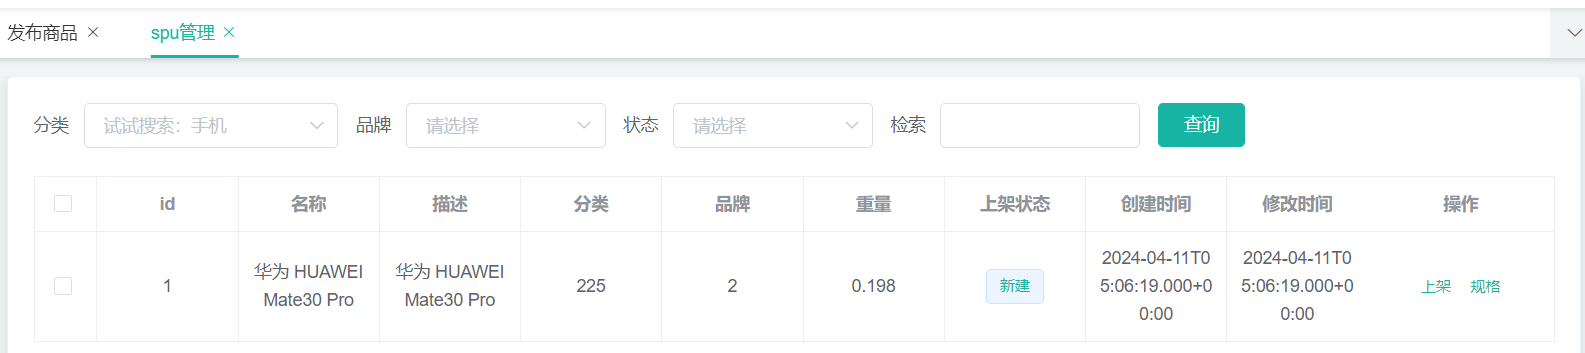
8.3新增商品 POST /product/spuinfo/save
参数:
{ "spuName" : "华为 HUAWEI Mate30 Pro" , "spuDescription" : "华为 HUAWEI Mate30 Pro" , "catalogId" : 225 , "brandId" : 2 , "weight" : 0.198 , "publishStatus" : 0 , "decript" : [ "https://gulimall20031201.oss-cn-chengdu.aliyuncs.com/2024-04-11//1c670d5a-5eed-4eb7-8573-ec4e475c8ed4_73366cc235d68202.jpg" , "https://gulimall20031201.oss-cn-chengdu.aliyuncs.com/2024-04-11//77d839cc-5e61-45b6-86ff-ff857d869f16_528211b97272d88a.jpg" ] , "images" : [ "https://gulimall20031201.oss-cn-chengdu.aliyuncs.com/2024-04-11//01da444d-4fc8-4745-8e6d-1bb736388c49_0d40c24b264aa511.jpg" , "https://gulimall20031201.oss-cn-chengdu.aliyuncs.com/2024-04-11//0232ea2e-d964-4ebb-864d-d0bab3f0da0d_1f15cdbcf9e1273c.jpg" , "https://gulimall20031201.oss-cn-chengdu.aliyuncs.com/2024-04-11//c519d573-1daf-4e53-84ba-0271aba53040_2b1837c6c50add30.jpg" , "https://gulimall20031201.oss-cn-chengdu.aliyuncs.com/2024-04-11//5cd361cd-d389-49f7-8250-8264d6a89a5a_8bf441260bffa42f.jpg" , "https://gulimall20031201.oss-cn-chengdu.aliyuncs.com/2024-04-11//d487cd03-1d01-4056-89b0-9aaef8bf7179_28f296629cca865e.jpg" , "https://gulimall20031201.oss-cn-chengdu.aliyuncs.com/2024-04-11//783d5381-2711-4fd7-8c6b-598eefb452bd_b5c6b23d01dcdf81.jpg" , "https://gulimall20031201.oss-cn-chengdu.aliyuncs.com/2024-04-11//478aaf6e-65f8-4235-8ab3-7208a4f85853_919c850652e98031.jpg" , "https://gulimall20031201.oss-cn-chengdu.aliyuncs.com/2024-04-11//53f4caf8-7cff-4696-89ea-225f4f1c6a0d_d511faab82abb34b.jpg" , "https://gulimall20031201.oss-cn-chengdu.aliyuncs.com/2024-04-11//3bd219db-002b-46bb-8cb8-c6d81c9877f1_a83bf5250e14caf2.jpg" ] , "bounds" : { "buyBounds" : 500 , "growBounds" : 500 } , "baseAttrs" : [ { "attrId" : 1 , "attrValues" : "2000" , "showDesc" : 0 } , { "attrId" : 6 , "attrValues" : "A2217" , "showDesc" : 0 } , { "attrId" : 3 , "attrValues" : "73.1mm" , "showDesc" : 0 } , { "attrId" : 7 , "attrValues" : "以官网信息为准;陶瓷" , "showDesc" : 0 } , { "attrId" : 8 , "attrValues" : "161.5mm" , "showDesc" : 0 } ] , "skus" : [ { "attr" : [ { "attrId" : 4 , "attrName" : "选择颜色" , "attrValue" : "亮黑色" } , { "attrId" : 5 , "attrName" : "选择版本" , "attrValue" : "8+256g" } ] , "skuName" : "华为 HUAWEI Mate30 Pro 亮黑色 8+256g" , "price" : "6299" , "skuTitle" : "华为 HUAWEI Mate30 Pro 亮黑色 8+256g麒麟990 4G/5G全网通" , "skuSubtitle" : "爆款热销 优选 速发" , "images" : [ { "imgUrl" : "https://gulimall20031201.oss-cn-chengdu.aliyuncs.com/2024-04-11//01da444d-4fc8-4745-8e6d-1bb736388c49_0d40c24b264aa511.jpg" , "defaultImg" : 1 } , { "imgUrl" : "" , "defaultImg" : 0 } , { "imgUrl" : "" , "defaultImg" : 0 } , { "imgUrl" : "https://gulimall20031201.oss-cn-chengdu.aliyuncs.com/2024-04-11//5cd361cd-d389-49f7-8250-8264d6a89a5a_8bf441260bffa42f.jpg" , "defaultImg" : 0 } , { "imgUrl" : "https://gulimall20031201.oss-cn-chengdu.aliyuncs.com/2024-04-11//d487cd03-1d01-4056-89b0-9aaef8bf7179_28f296629cca865e.jpg" , "defaultImg" : 0 } , { "imgUrl" : "" , "defaultImg" : 0 } , { "imgUrl" : "" , "defaultImg" : 0 } , { "imgUrl" : "" , "defaultImg" : 0 } , { "imgUrl" : "" , "defaultImg" : 0 } ] , "descar" : [ "亮黑色" , "8+256g" ] , "fullCount" : 3 , "discount" : 0.98 , "countStatus" : 0 , "fullPrice" : 10000 , "reducePrice" : 50 , "priceStatus" : 0 , "memberPrice" : [ { "id" : 2 , "name" : "铜牌会员" , "price" : 6159 } ] } , { "attr" : [ { "attrId" : 4 , "attrName" : "选择颜色" , "attrValue" : "亮黑色" } , { "attrId" : 5 , "attrName" : "选择版本" , "attrValue" : "8+128g" } ] , "skuName" : "华为 HUAWEI Mate30 Pro 亮黑色 8+128g" , "price" : "5799" , "skuTitle" : "华为 HUAWEI Mate30 Pro 亮黑色 8+128g麒麟990 4G/5G全网通" , "skuSubtitle" : "爆款热销 优选 速发" , "images" : [ { "imgUrl" : "https://gulimall20031201.oss-cn-chengdu.aliyuncs.com/2024-04-11//01da444d-4fc8-4745-8e6d-1bb736388c49_0d40c24b264aa511.jpg" , "defaultImg" : 1 } , { "imgUrl" : "" , "defaultImg" : 0 } , { "imgUrl" : "" , "defaultImg" : 0 } , { "imgUrl" : "https://gulimall20031201.oss-cn-chengdu.aliyuncs.com/2024-04-11//5cd361cd-d389-49f7-8250-8264d6a89a5a_8bf441260bffa42f.jpg" , "defaultImg" : 0 } , { "imgUrl" : "https://gulimall20031201.oss-cn-chengdu.aliyuncs.com/2024-04-11//d487cd03-1d01-4056-89b0-9aaef8bf7179_28f296629cca865e.jpg" , "defaultImg" : 0 } , { "imgUrl" : "" , "defaultImg" : 0 } , { "imgUrl" : "" , "defaultImg" : 0 } , { "imgUrl" : "" , "defaultImg" : 0 } , { "imgUrl" : "" , "defaultImg" : 0 } ] , "descar" : [ "亮黑色" , "8+128g" ] , "fullCount" : 0 , "discount" : 0 , "countStatus" : 0 , "fullPrice" : 0 , "reducePrice" : 0 , "priceStatus" : 0 , "memberPrice" : [ { "id" : 2 , "name" : "铜牌会员" , "price" : 0 } ] } , { "attr" : [ { "attrId" : 4 , "attrName" : "选择颜色" , "attrValue" : "星河银" } , { "attrId" : 5 , "attrName" : "选择版本" , "attrValue" : "8+256g" } ] , "skuName" : "华为 HUAWEI Mate30 Pro 星河银 8+256g" , "price" : "6299" , "skuTitle" : "华为 HUAWEI Mate30 Pro 星河银 8+256g麒麟990 4G/5G全网通" , "skuSubtitle" : "爆款热销 优选 速发" , "images" : [ { "imgUrl" : "" , "defaultImg" : 0 } , { "imgUrl" : "https://gulimall20031201.oss-cn-chengdu.aliyuncs.com/2024-04-11//0232ea2e-d964-4ebb-864d-d0bab3f0da0d_1f15cdbcf9e1273c.jpg" , "defaultImg" : 1 } , { "imgUrl" : "" , "defaultImg" : 0 } , { "imgUrl" : "" , "defaultImg" : 0 } , { "imgUrl" : "" , "defaultImg" : 0 } , { "imgUrl" : "" , "defaultImg" : 0 } , { "imgUrl" : "https://gulimall20031201.oss-cn-chengdu.aliyuncs.com/2024-04-11//478aaf6e-65f8-4235-8ab3-7208a4f85853_919c850652e98031.jpg" , "defaultImg" : 0 } , { "imgUrl" : "https://gulimall20031201.oss-cn-chengdu.aliyuncs.com/2024-04-11//53f4caf8-7cff-4696-89ea-225f4f1c6a0d_d511faab82abb34b.jpg" , "defaultImg" : 0 } , { "imgUrl" : "" , "defaultImg" : 0 } ] , "descar" : [ "星河银" , "8+256g" ] , "fullCount" : 0 , "discount" : 0 , "countStatus" : 0 , "fullPrice" : 0 , "reducePrice" : 0 , "priceStatus" : 0 , "memberPrice" : [ { "id" : 2 , "name" : "铜牌会员" , "price" : 0 } ] } , { "attr" : [ { "attrId" : 4 , "attrName" : "选择颜色" , "attrValue" : "星河银" } , { "attrId" : 5 , "attrName" : "选择版本" , "attrValue" : "8+128g" } ] , "skuName" : "华为 HUAWEI Mate30 Pro 星河银 8+128g" , "price" : "5799" , "skuTitle" : "华为 HUAWEI Mate30 Pro 星河银 8+128g麒麟990 4G/5G全网通" , "skuSubtitle" : "爆款热销 优选 速发" , "images" : [ { "imgUrl" : "" , "defaultImg" : 0 } , { "imgUrl" : "https://gulimall20031201.oss-cn-chengdu.aliyuncs.com/2024-04-11//0232ea2e-d964-4ebb-864d-d0bab3f0da0d_1f15cdbcf9e1273c.jpg" , "defaultImg" : 1 } , { "imgUrl" : "" , "defaultImg" : 0 } , { "imgUrl" : "" , "defaultImg" : 0 } , { "imgUrl" : "" , "defaultImg" : 0 } , { "imgUrl" : "" , "defaultImg" : 0 } , { "imgUrl" : "https://gulimall20031201.oss-cn-chengdu.aliyuncs.com/2024-04-11//478aaf6e-65f8-4235-8ab3-7208a4f85853_919c850652e98031.jpg" , "defaultImg" : 0 } , { "imgUrl" : "https://gulimall20031201.oss-cn-chengdu.aliyuncs.com/2024-04-11//53f4caf8-7cff-4696-89ea-225f4f1c6a0d_d511faab82abb34b.jpg" , "defaultImg" : 0 } , { "imgUrl" : "" , "defaultImg" : 0 } ] , "descar" : [ "星河银" , "8+128g" ] , "fullCount" : 0 , "discount" : 0 , "countStatus" : 0 , "fullPrice" : 0 , "reducePrice" : 0 , "priceStatus" : 0 , "memberPrice" : [ { "id" : 2 , "name" : "铜牌会员" , "price" : 0 } ] } , { "attr" : [ { "attrId" : 4 , "attrName" : "选择颜色" , "attrValue" : "翡冷绿" } , { "attrId" : 5 , "attrName" : "选择版本" , "attrValue" : "8+256g" } ] , "skuName" : "华为 HUAWEI Mate30 Pro 翡冷绿 8+256g" , "price" : "6299" , "skuTitle" : "华为 HUAWEI Mate30 Pro 翡冷绿 8+256g麒麟990 4G/5G全网通" , "skuSubtitle" : "爆款热销 优选 速发" , "images" : [ { "imgUrl" : "https://gulimall20031201.oss-cn-chengdu.aliyuncs.com/2024-04-11//01da444d-4fc8-4745-8e6d-1bb736388c49_0d40c24b264aa511.jpg" , "defaultImg" : 1 } , { "imgUrl" : "" , "defaultImg" : 0 } , { "imgUrl" : "" , "defaultImg" : 0 } , { "imgUrl" : "" , "defaultImg" : 0 } , { "imgUrl" : "" , "defaultImg" : 0 } , { "imgUrl" : "https://gulimall20031201.oss-cn-chengdu.aliyuncs.com/2024-04-11//783d5381-2711-4fd7-8c6b-598eefb452bd_b5c6b23d01dcdf81.jpg" , "defaultImg" : 0 } , { "imgUrl" : "" , "defaultImg" : 0 } , { "imgUrl" : "" , "defaultImg" : 0 } , { "imgUrl" : "https://gulimall20031201.oss-cn-chengdu.aliyuncs.com/2024-04-11//3bd219db-002b-46bb-8cb8-c6d81c9877f1_a83bf5250e14caf2.jpg" , "defaultImg" : 0 } ] , "descar" : [ "翡冷绿" , "8+256g" ] , "fullCount" : 0 , "discount" : 0 , "countStatus" : 0 , "fullPrice" : 0 , "reducePrice" : 0 , "priceStatus" : 0 , "memberPrice" : [ { "id" : 2 , "name" : "铜牌会员" , "price" : 0 } ] } , { "attr" : [ { "attrId" : 4 , "attrName" : "选择颜色" , "attrValue" : "翡冷绿" } , { "attrId" : 5 , "attrName" : "选择版本" , "attrValue" : "8+128g" } ] , "skuName" : "华为 HUAWEI Mate30 Pro 翡冷绿 8+128g" , "price" : "5799" , "skuTitle" : "华为 HUAWEI Mate30 Pro 翡冷绿 8+128g麒麟990 4G/5G全网通" , "skuSubtitle" : "爆款热销 优选 速发" , "images" : [ { "imgUrl" : "https://gulimall20031201.oss-cn-chengdu.aliyuncs.com/2024-04-11//01da444d-4fc8-4745-8e6d-1bb736388c49_0d40c24b264aa511.jpg" , "defaultImg" : 1 } , { "imgUrl" : "" , "defaultImg" : 0 } , { "imgUrl" : "" , "defaultImg" : 0 } , { "imgUrl" : "" , "defaultImg" : 0 } , { "imgUrl" : "" , "defaultImg" : 0 } , { "imgUrl" : "https://gulimall20031201.oss-cn-chengdu.aliyuncs.com/2024-04-11//783d5381-2711-4fd7-8c6b-598eefb452bd_b5c6b23d01dcdf81.jpg" , "defaultImg" : 0 } , { "imgUrl" : "" , "defaultImg" : 0 } , { "imgUrl" : "" , "defaultImg" : 0 } , { "imgUrl" : "https://gulimall20031201.oss-cn-chengdu.aliyuncs.com/2024-04-11//3bd219db-002b-46bb-8cb8-c6d81c9877f1_a83bf5250e14caf2.jpg" , "defaultImg" : 0 } ] , "descar" : [ "翡冷绿" , "8+128g" ] , "fullCount" : 0 , "discount" : 0 , "countStatus" : 0 , "fullPrice" : 0 , "reducePrice" : 0 , "priceStatus" : 0 , "memberPrice" : [ { "id" : 2 , "name" : "铜牌会员" , "price" : 0 } ] } , { "attr" : [ { "attrId" : 4 , "attrName" : "选择颜色" , "attrValue" : "罗兰紫" } , { "attrId" : 5 , "attrName" : "选择版本" , "attrValue" : "8+256g" } ] , "skuName" : "华为 HUAWEI Mate30 Pro 罗兰紫 8+256g" , "price" : "6299" , "skuTitle" : "华为 HUAWEI Mate30 Pro 罗兰紫 8+256g麒麟990 4G/5G全网通" , "skuSubtitle" : "爆款热销 优选 速发" , "images" : [ { "imgUrl" : "https://gulimall20031201.oss-cn-chengdu.aliyuncs.com/2024-04-11//01da444d-4fc8-4745-8e6d-1bb736388c49_0d40c24b264aa511.jpg" , "defaultImg" : 1 } , { "imgUrl" : "" , "defaultImg" : 0 } , { "imgUrl" : "" , "defaultImg" : 0 } , { "imgUrl" : "" , "defaultImg" : 0 } , { "imgUrl" : "" , "defaultImg" : 0 } , { "imgUrl" : "https://gulimall20031201.oss-cn-chengdu.aliyuncs.com/2024-04-11//783d5381-2711-4fd7-8c6b-598eefb452bd_b5c6b23d01dcdf81.jpg" , "defaultImg" : 0 } , { "imgUrl" : "" , "defaultImg" : 0 } , { "imgUrl" : "" , "defaultImg" : 0 } , { "imgUrl" : "https://gulimall20031201.oss-cn-chengdu.aliyuncs.com/2024-04-11//3bd219db-002b-46bb-8cb8-c6d81c9877f1_a83bf5250e14caf2.jpg" , "defaultImg" : 0 } ] , "descar" : [ "罗兰紫" , "8+256g" ] , "fullCount" : 0 , "discount" : 0 , "countStatus" : 0 , "fullPrice" : 0 , "reducePrice" : 0 , "priceStatus" : 0 , "memberPrice" : [ { "id" : 2 , "name" : "铜牌会员" , "price" : 0 } ] } , { "attr" : [ { "attrId" : 4 , "attrName" : "选择颜色" , "attrValue" : "罗兰紫" } , { "attrId" : 5 , "attrName" : "选择版本" , "attrValue" : "8+128g" } ] , "skuName" : "华为 HUAWEI Mate30 Pro 罗兰紫 8+128g" , "price" : "5799" , "skuTitle" : "华为 HUAWEI Mate30 Pro 罗兰紫 8+128g麒麟990 4G/5G全网通" , "skuSubtitle" : "爆款热销 优选 速发" , "images" : [ { "imgUrl" : "https://gulimall20031201.oss-cn-chengdu.aliyuncs.com/2024-04-11//01da444d-4fc8-4745-8e6d-1bb736388c49_0d40c24b264aa511.jpg" , "defaultImg" : 1 } , { "imgUrl" : "" , "defaultImg" : 0 } , { "imgUrl" : "" , "defaultImg" : 0 } , { "imgUrl" : "" , "defaultImg" : 0 } , { "imgUrl" : "" , "defaultImg" : 0 } , { "imgUrl" : "https://gulimall20031201.oss-cn-chengdu.aliyuncs.com/2024-04-11//783d5381-2711-4fd7-8c6b-598eefb452bd_b5c6b23d01dcdf81.jpg" , "defaultImg" : 0 } , { "imgUrl" : "" , "defaultImg" : 0 } , { "imgUrl" : "" , "defaultImg" : 0 } , { "imgUrl" : "https://gulimall20031201.oss-cn-chengdu.aliyuncs.com/2024-04-11//3bd219db-002b-46bb-8cb8-c6d81c9877f1_a83bf5250e14caf2.jpg" , "defaultImg" : 0 } ] , "descar" : [ "罗兰紫" , "8+128g" ] , "fullCount" : 0 , "discount" : 0 , "countStatus" : 0 , "fullPrice" : 0 , "reducePrice" : 0 , "priceStatus" : 0 , "memberPrice" : [ { "id" : 2 , "name" : "铜牌会员" , "price" : 0 } ] } ] }
修改“com.atguigu.gulimall.product.controller.SpuInfoController”类:
@RequestMapping("/save") public R save (@RequestBody SpuSaveVo vo) { spuInfoService.saveSpuInfo(vo); return R.ok(); }
修改“com.atguigu.gulimall.product.service.impl.SpuInfoServiceImpl”类:
@Transactional @Override public void saveSpuInfo (SpuSaveVo vo) { SpuInfoEntity spuInfoEntity = new SpuInfoEntity (); BeanUtils.copyProperties(vo,spuInfoEntity); spuInfoEntity.setCreateTime(new Date ()); spuInfoEntity.setUpdateTime(new Date ()); this .saveBaseSpuInfo(spuInfoEntity); List<String> decript = vo.getDecript(); SpuInfoDescEntity descEntity = new SpuInfoDescEntity (); descEntity.setSpuId(spuInfoEntity.getId()); descEntity.setDecript(String.join("," ,decript)); spuInfoDescService.saveSpuInfoDesc(descEntity); List<String> images = vo.getImages(); spuImagesService.saveImages(spuInfoEntity.getId(),images); List<BaseAttrs> baseAttrs = vo.getBaseAttrs(); List<ProductAttrValueEntity> collect = baseAttrs.stream().map(attr -> { ProductAttrValueEntity productAttrValueEntity = new ProductAttrValueEntity (); productAttrValueEntity.setAttrId(attr.getAttrId()); AttrEntity id = attrService.getById(attr.getAttrId()); productAttrValueEntity.setAttrName(id.getAttrName()); productAttrValueEntity.setAttrValue(attr.getAttrValues()); productAttrValueEntity.setQuickShow(attr.getShowDesc()); productAttrValueEntity.setSpuId(spuInfoEntity.getId()); return productAttrValueEntity; }).collect(Collectors.toList()); productAttrValueService.saveProductAttr(collect); Bounds bounds = vo.getBounds(); SpuBoundsTo spuBoundsTo = new SpuBoundsTo (); BeanUtils.copyProperties(bounds,spuBoundsTo); spuBoundsTo.setSpuId(spuInfoEntity.getId()); R r = couponFeignService.saveSpuBounds(spuBoundsTo); if (r.getCode() != 0 ){ log.error("远程保存spu信息失败" ); } List<Skus> skus = vo.getSkus(); if (skus != null && skus.size() > 0 ){ skus.forEach(item->{ String defaultImg = "" ; for (Images img : item.getImages()) { if (img.getDefaultImg() == 1 ){ defaultImg = img.getImgUrl(); } } SkuInfoEntity skuInfoEntity = new SkuInfoEntity (); BeanUtils.copyProperties(item,skuInfoEntity); skuInfoEntity.setBrandId(spuInfoEntity.getBrandId()); skuInfoEntity.setCatalogId(spuInfoEntity.getCatalogId()); skuInfoEntity.setSaleCount(0L ); skuInfoEntity.setSpuId(spuInfoEntity.getId()); skuInfoEntity.setSkuDefaultImg(defaultImg); skuInfoService.saveSkuInfo(skuInfoEntity); Long skuId = skuInfoEntity.getSkuId(); List<SkuImagesEntity> imagesEntities = item.getImages().stream().map(img -> { SkuImagesEntity skuImagesEntity = new SkuImagesEntity (); skuImagesEntity.setSkuId(skuId); skuImagesEntity.setImgUrl(img.getImgUrl()); skuImagesEntity.setDefaultImg(img.getDefaultImg()); return skuImagesEntity; }).filter(entity->{ return !StringUtils.isEmpty(entity.getImgUrl()); }).collect(Collectors.toList()); skuImagesService.saveBatch(imagesEntities); List<Attr> attr = item.getAttr(); List<SkuSaleAttrValueEntity> saleAttrValueEntities = attr.stream().map(a -> { SkuSaleAttrValueEntity attrValueEntity = new SkuSaleAttrValueEntity (); BeanUtils.copyProperties(a, attrValueEntity); attrValueEntity.setSkuId(skuId); return attrValueEntity; }).collect(Collectors.toList()); skuSaleAttrValueService.saveBatch(saleAttrValueEntities); SkuReductionTo skuReductionTo = new SkuReductionTo (); BeanUtils.copyProperties(item,skuReductionTo); skuReductionTo.setSkuId(skuId); if (skuReductionTo.getFullCount() > 0 || skuReductionTo.getFullPrice().compareTo(new BigDecimal ("0" )) == 1 ){ R r1 = couponFeignService.saveSkuReduction(skuReductionTo); if (r1.getCode() != 0 ){ log.error("远程保存sku优惠信息失败" ); } } }); } }
保存spu基本信息 pms_spu_info
修改“com.atguigu.gulimall.product.service.impl.SpuInfoServiceImpl”类:
@Override public void saveBaseSpuInfo (SpuInfoEntity infoEntity) { this .baseMapper.insert(infoEntity); }
保存spu的描述图片 pms_spu_info_desc
修改“com.atguigu.gulimall.product.service.impl.SpuInfoDescServiceImpl”类:
@Override public void saveSpuInfoDesc (SpuInfoDescEntity descEntity) { this .baseMapper.insert(descEntity); }
保存spu的图片集 pms_spu_images
修改“com.atguigu.gulimall.product.service.impl.SpuImagesServiceImpl”类:
@Override public void saveImages (Long id, List<String> images) { if (images == null || images.size() == 0 ){ }else { List<SpuImagesEntity> collect = images.stream().map(img -> { SpuImagesEntity spuImagesEntity = new SpuImagesEntity (); spuImagesEntity.setSpuId(id); spuImagesEntity.setImgUrl(img); return spuImagesEntity; }).collect(Collectors.toList()); this .saveBatch(collect); } }
保存spu的规格参数 pms_product_attr_value
修改“com.atguigu.gulimall.product.service.impl.ProductAttrValueServiceImpl”类:
@Override public void saveProductAttr (List<ProductAttrValueEntity> collect) { this .saveBatch(collect); }
保存spu的积分信息 gulimall_sms –> sms_spu_bounds
这里需要远程调用第三方服务
2、在启动类GulimallProductApplication中加上@EnableFeignClients(basePackages = “com.atguigu.gulimall.product.feign”)
3、在gulimall-common添加服务与服务之间调用的to类“com.atguigu.common.to.SpuBoundTo”类:
每个服务间传递的数据可以封装到这个to内
@Data
public class SpuBoundTo {
    private Long SpuId;
    private BigDecimal buyBounds;
    private BigDecimal growBounds;
}
修改“com.atguigu.gulimall.product.feign.CouponFeignService”类:
@FeignClient("gulimall-coupon") public interface CouponFeignService { @PostMapping("/coupon/spubounds/save") R saveSpuBounds (@RequestBody SpuBoundsTo spuBoundsTo) ; @PostMapping("/coupon/skufullreduction/saveInfo") R saveSkuReduction (@RequestBody SkuReductionTokuReductionTo) ; }
com.atguigu.gulimall.coupon.controller.SpuBoundsController接口
@PostMapping("/save") public R save (@RequestBody SpuBoundsEntity spuBounds) { spuBoundsService.save(spuBounds); return R.ok(); }
保存当前spu对应的所有sku信息
修改“com.atguigu.gulimall.product.service.impl.SkuInfoServiceImpl”类,代码如下:
@Override public void saveSkuInfo (SkuInfoEntity skuInfoEntity) { this .baseMapper.insert(skuInfoEntity); }
2)、sku的优惠、满减等信息 gulimall_sms -> sms_sku_ladder/sms_sku_full_reduction/sms_member_price
在gulimall-common添加服务与服务之间调用的to类“com.atguigu.common.to.MemberPrice”,“com.atguigu.common.to.SkuReductionTo”类,代码如下:
@Data
public class SkuReductionTo {

    private Long skuId;
    private int fullCount;
    private BigDecimal discount;
    private int countStatus;
    private BigDecimal fullPrice;
    private BigDecimal reducePrice;
    private int priceStatus;
    private List<MemberPrice> memberPrice;
}
@Data
public class MemberPrice {

    private Long id;
    private String name;
    private BigDecimal price;

}
然后我把product服务中的memberPrice删除了,不然会报空指针异常。
修改“com.atguigu.gulimall.coupon.service.impl.SkuFullReductionServiceImpl”类:
@Override public void saveSkuReduction (SkuReductionTo reductionTo) { System.out.println("---->" +reductionTo); SkuLadderEntity skuLadderEntity = new SkuLadderEntity (); skuLadderEntity.setSkuId(reductionTo.getSkuId()); skuLadderEntity.setFullCount(reductionTo.getFullCount()); skuLadderEntity.setDiscount(reductionTo.getDiscount()); skuLadderEntity.setAddOther(reductionTo.getCountStatus()); if (reductionTo.getFullCount() > 0 ){ skuLadderService.save(skuLadderEntity); } SkuFullReductionEntity skuFullReductionEntity = new SkuFullReductionEntity (); BeanUtils.copyProperties(reductionTo,skuFullReductionEntity); if (reductionTo.getFullPrice().compareTo(new BigDecimal ("0" )) == 1 ){ this .save(skuFullReductionEntity); } List<MemberPrice> memberPrice = reductionTo.getMemberPrice(); List<MemberPriceEntity> collect = memberPrice.stream().map(item -> { MemberPriceEntity memberPriceEntity = new MemberPriceEntity (); memberPriceEntity.setSkuId(reductionTo.getSkuId()); memberPriceEntity.setMemberLevelId(item.getId()); memberPriceEntity.setMemberLevelName(item.getName()); memberPriceEntity.setMemberPrice(item.getPrice()); memberPriceEntity.setAddOther(1 ); return memberPriceEntity; }).filter(item->{ return item.getMemberPrice().compareTo(new BigDecimal ("0" )) == 1 ; }).collect(Collectors.toList()); memberPriceService.saveBatch(collect); }
添加成功
9、spu&sku检索 9.1spu检索 GET /product/spuinfo/list
请求参数
{
    page: 1,//当前页码
            limit: 10,//每页记录数
        sidx: 'id',//排序字段
        order: 'asc/desc',//排序方式
        key: '华为',//检索关键字
        catelogId: 6,//三级分类id
        brandId: 1,//品牌id
        status: 0,//商品状态
}
分页数据
响应数据
{
    "msg": "success",
        "code": 0,
        "page": {
    "totalCount": 0,
            "pageSize": 10,
            "totalPage": 0,
            "currPage": 1,
            "list": [{

        "brandId": 0, //品牌id
                "brandName": "品牌名字",
                "catalogId": 0, //分类id
                "catalogName": "分类名字",
                "createTime": "2019-11-13T16:07:32.877Z", //创建时间
                "id": 0, //商品id
                "publishStatus": 0, //发布状态
                "spuDescription": "string", //商品描述
                "spuName": "string", //商品名字
                "updateTime": "2019-11-13T16:07:32.877Z", //更新时间
                "weight": 0 //重量

    }]
}
}
修改“com.atguigu.gulimall.product.controller.SpuInfoController”类:
@RequestMapping("/list") public R list (@RequestParam Map<String, Object> params) { PageUtils page = spuInfoService.queryPageByCondition(params); return R.ok().put("page" , page); }
修改“com.atguigu.gulimall.product.service.impl.SpuInfoServiceImpl”类:
@Override
   public PageUtils queryPageByCondition(Map<String, Object> params) {
       QueryWrapper<SpuInfoEntity> wrapper = new QueryWrapper<>();
       String key = (String) params.get("key");
       if (!StringUtils.isEmpty(key)){
           wrapper.and(w->{
               w.eq("id",key).or().like("spu_name",key);
           });
       }
       String status = (String) params.get("status");
       System.out.println("====>"+status);
       if (!StringUtils.isEmpty(status)){
           wrapper.eq("publish_status",status);
       }
       String brandId = (String) params.get("brandId");
       if (!StringUtils.isEmpty(brandId) &&  !"0".equalsIgnoreCase(brandId)){
           wrapper.eq("brand_id",brandId);
       }
       String catelogId = (String) params.get("catelogId");
       if (!StringUtils.isEmpty(catelogId) &&  !"0".equalsIgnoreCase(catelogId)){
           wrapper.eq("catalog_id",catelogId);
       }
       IPage<SpuInfoEntity> page = this.page(
               new Query<SpuInfoEntity>().getPage(params),
               wrapper
       );
       return new PageUtils(page);
   }
前端显示时间格式化一下,product服务中的application.yml配置指定格式化
spring:
  jackson:
    date-format: yyyy-MM-dd HH:mm:ss
9.2sku检索 GET /product/skuinfo/list
请求参数
{ page: 1 , limit: 10 , sidx: 'id', order: 'asc/desc', key: '华为', catelogId: 0 , brandId: 0 , min: 0 , max: 0 }
分页数据
响应数据
{ "msg" : "success" , "code" : 0 , "page" : { "totalCount" : 26 , "pageSize" : 10 , "totalPage" : 3 , "currPage" : 1 , "list" : [ { "skuId" : 1 , "spuId" : 11 , "skuName" : "华为 HUAWEI Mate 30 Pro 星河银 8GB+256GB" , "skuDesc" : null , "catalogId" : 225 , "brandId" : 9 , "skuDefaultImg" : "https://gulimall-hello.oss-cn-beijing.aliyuncs.com/2019-11-26/60e65a44-f943-4ed5-87c8-8cf90f403018_d511faab82abb34b.jpg" , "skuTitle" : "华为 HUAWEI Mate 30 Pro 星河银 8GB+256GB麒麟990旗舰芯片OLED环幕屏双4000万徕卡电影四摄4G全网通手机" , "skuSubtitle" : "【现货抢购!享白条12期免息!】麒麟990,OLED环幕屏双4000万徕卡电影四摄;Mate30系列享12期免息》" , "price" : 6299.0000 , "saleCount" : 0 } ] } }
修改“com.atguigu.gulimall.product.controller.SkuInfoController”类,代码如下:
 @RequestMapping("/list")
    public R list(@RequestParam Map<String, Object> params){
        PageUtils page = skuInfoService.queryPageByCondition(params);

        return R.ok().put("page", page);
    }
修改“com.atguigu.gulimall.product.service.SkuInfoService”类,代码如下:
PageUtils queryPageByCondition(Map<String, Object> params);
修改“com.atguigu.gulimall.product.service.impl.SkuInfoServiceImpl”类,代码如下:
@Override
    public PageUtils queryPageByCondition(Map<String, Object> params) {
        QueryWrapper<SkuInfoEntity> queryWrapper = new QueryWrapper<>();

        String key = (String) params.get("key");
        if (!StringUtils.isEmpty(key)){
            queryWrapper.and((w)->{
                w.eq("sku_id",key).or().like("sku_name",key);
            });
        }

        String catelogId = (String) params.get("catelogId");
        if (!StringUtils.isEmpty(catelogId) && !"0".equalsIgnoreCase(catelogId)){
            queryWrapper.eq("catalog_id",catelogId);
        }

        String brandId = (String) params.get("brandId");
        if (!StringUtils.isEmpty(brandId) && !"0".equalsIgnoreCase(brandId)){
            queryWrapper.eq("brand_id",brandId);
        }

        String min = (String) params.get("min");
        if (!StringUtils.isEmpty(min)){
            queryWrapper.ge("price",min);
        }

        String max = (String) params.get("max");
        if (!StringUtils.isEmpty(max)){
            try{
                BigDecimal bigDecimal = new BigDecimal(max);
                if (bigDecimal.compareTo(new BigDecimal("0"))==1){
                    queryWrapper.le("price",max);
                }
            }catch (Exception e){

            }
        }

        IPage<SkuInfoEntity> page = this.page(
                new Query<SkuInfoEntity>().getPage(params),
                queryWrapper
        );
        return new PageUtils(page);
    }
五、仓储服务 1.仓库管理 1.1启动仓库服务&获取仓库列表 API : GET /ware/wareinfo/list
请求参数
{
   page: 1,//当前页码
   limit: 10,//每页记录数
   sidx: 'id',//排序字段
   order: 'asc/desc',//排序方式
   key: '华为'//检索关键字
}
响应数据:
{
	"msg": "success",
	"code": 0,
	"page": {
		"totalCount": 0,
		"pageSize": 10,
		"totalPage": 0,
		"currPage": 1,
		"list": [{
			"id": 2,
			"name": "aa",
			"address": "bbb",
			"areacode": "124"
		}]
	}
}
1.pom.xml
<dependency > <groupId > com.atguigu.gulimall</groupId > <artifactId > gulimall-common</artifactId > <version > 0.0.1-SNAPSHOT</version > </dependency > <dependency > <groupId > org.springframework.cloud</groupId > <artifactId > spring-cloud-starter-bootstrap</artifactId > </dependency > <dependency > <groupId > org.springframework.cloud</groupId > <artifactId > spring-cloud-loadbalancer</artifactId > </dependency >
application.yml
spring:
  datasource:
    username: root
    password: root
    url: jdbc:mysql://8.138.99.194:3306/gulimall_wms?useSSL=false&serverTimezone=UTC
    driver-class-name: com.mysql.cj.jdbc.Driver
  cloud:
    nacos:
      discovery:
        server-addr: localhost:8848
  application:
    name: gulimall-ware

mybatis-plus:
  mapper-locations: classpath:/mapper/**/*.xml
  global-config:
    db-config:
      id-type: auto
server:
  port: 11000

logging:
  level:
    com.atguigu: debug
3.@EnableTransactionManagement启动类上加
4.gateway加
- id: ware_route
  uri: lb://gulimall-ware
  predicates:
    - Path=/api/ware/**
  filters:
    - RewritePath=/api/(?<segment>.*),/$\{segment}
5.com.atguigu.gulimall.ware.controller.WareInfoController获取仓库列表
@RequestMapping("/list") public R list (@RequestParam Map<String, Object> params) { PageUtils page = wareInfoService.queryPage(params); return R.ok().put("page" , page); }
6.com.atguigu.gulimall.ware.service.impl.WareInfoServiceImpl加入模糊查询
@Override public PageUtils queryPage (Map<String, Object> params) { QueryWrapper<WareInfoEntity> wrapper = new QueryWrapper <>(); String key = (String) params.get("key" ); if (!StringUtils.isEmpty(key)){ wrapper.and(w->{ w.eq("id" ,key).or().like("name" ,key).or().like("address" ,key) .or().eq("areacode" ,key); }); } IPage<WareInfoEntity> page = this .page( new Query <WareInfoEntity>().getPage(params), wrapper ); return new PageUtils (page); }
1.2查询库存&查询采购需求 查询商品库存API :GET /ware/waresku/list
请求参数:
{
   page: 1,//当前页码
   limit: 10,//每页记录数
   sidx: 'id',//排序字段
   order: 'asc/desc',//排序方式
   wareId: 123,//仓库id
   skuId: 123//商品id
}
响应参数:
{
	"msg": "success",
	"code": 0,
	"page": {
		"totalCount": 0,
		"pageSize": 10,
		"totalPage": 0,
		"currPage": 1,
		"list": [{
			"id": 1,
			"skuId": 1,
			"wareId": 1,
			"stock": 1,
			"skuName": "dd",
			"stockLocked": 1
		}]
	}
}
1.com.atguigu.gulimall.ware.controller.WareSkuController
@RequestMapping("/list") public R list (@RequestParam Map<String, Object> params) { PageUtils page = wareSkuService.queryPage(params); return R.ok().put("page" , page); }
2.com.atguigu.gulimall.ware.service.impl.WareSkuServiceImpl
@Override public PageUtils queryPage (Map<String, Object> params) { QueryWrapper<WareSkuEntity> wrapper = new QueryWrapper <>(); String skuId = (String) params.get("skuId" ); if (!StringUtils.isEmpty(skuId)){ wrapper.eq("sku_id" ,skuId); } String wareId = (String) params.get("wareId" ); if (!StringUtils.isEmpty(wareId)){ wrapper.eq("ware_id" ,wareId); } IPage<WareSkuEntity> page = this .page( new Query <WareSkuEntity>().getPage(params), wrapper ); return new PageUtils (page); }
查询采购需求
API: GET /ware/purchasedetail/list
请求参数
{ page: 1 , limit: 10 , sidx: 'id' , order: 'asc/desc' , key: '华为' , status: 0 , wareId: 1 , }
响应数据
{ "msg" : "success" , "code" : 0 , "page" : { "totalCount" : 0 , "pageSize" : 10 , "totalPage" : 0 , "currPage" : 1 , "list" : [{ "id" : 2 , "purchaseId" : 1 , "skuId" : 1 , "skuNum" : 2 , "skuPrice" : 22.0000 , "wareId" : 1 , "status" : 1 }] } }
1.com.atguigu.gulimall.ware.controller.PurchaseDetailController
@RequestMapping("/list") public R list (@RequestParam Map<String, Object> params) { PageUtils page = purchaseDetailService.queryPage(params); return R.ok().put("page" , page); }
2.com.atguigu.gulimall.ware.service.impl.PurchaseDetailServiceImpl
@Override public PageUtils queryPage (Map<String, Object> params) { QueryWrapper<PurchaseDetailEntity> queryWrapper = new QueryWrapper <>(); String key = (String) params.get("key" ); if (!StringUtils.isEmpty(key)){ queryWrapper.and(w->{ w.eq("purchase_id" ,key).or().eq("sku_id" ,key); }); } String status = (String) params.get("status" ); if (!StringUtils.isEmpty(status)){ queryWrapper.eq("status" ,status); } String wareId = (String) params.get("wareId" ); if (!StringUtils.isEmpty(wareId)){ queryWrapper.eq("ware_id" ,wareId); } IPage<PurchaseDetailEntity> page = this .page( new Query <PurchaseDetailEntity>().getPage(params), queryWrapper ); return new PageUtils (page); }
1.3合并采购需求
1.点击合并整单先发送查询未领取采购单需求
GET /ware/purchase/unreceive/list
响应数据
{ "msg" : "success" , "code" : 0 , "page" : { "totalCount" : 0 , "pageSize" : 10 , "totalPage" : 0 , "currPage" : 1 , "list" : [{ "id" : 1 , "assigneeId" : 1 , "assigneeName" : "aa" , "phone" : "123" , "priority" : 1 , "status" : 1 , "wareId" : 1 , "amount" : 22.0000 , "createTime" : "2019-12-12" , "updateTime" : "2019-12-12" }] } }
@RequestMapping("/unreceive/list") public R unreceiveList (@RequestParam Map<String, Object> params) { PageUtils page = purchaseService.queryPageUnreceivePurchase(params); return R.ok().put("page" , page); }
@Override public PageUtils queryPageUnreceivePurchase (Map<String, Object> params) { IPage<PurchaseEntity> page = this .page( new Query <PurchaseEntity>().getPage(params), new QueryWrapper <PurchaseEntity>().eq("status" ,0 ).or().eq("status" ,1 ) ); return new PageUtils (page); }
可以查出采购单了
合并采购需求:
POST /ware/purchase/merge
请求参数
{
  purchaseId: 1, //整单id
  items:[1,2,3,4] //合并项集合
}
响应数据
{
	"msg": "success",
	"code": 0
}
1.定义MergeVo
@Data
public class MergeVo {
    private Long purchaseId;
    private List<Long> items;
}
2.编写采购单状态和采购需求状态枚举
public class WareConstant { public enum PurchaseStatusEnum { CREATED(0 ,"新建" ), ASSIGNED(1 ,"已分配" ), RECEIVE(2 ,"已领取" ), FINISH(3 ,"已完成" ), HASEERR(4 ,"有异常" ); private int code; private String msg; PurchaseStatusEnum(int code, String msg) { this .code = code; this .msg = msg; } public int getCode () { return code; } public String getMsg () { return msg; } } public enum PurchaseDetailStatusEnum { CREATED(0 ,"新建" ), ASSIGNED(1 ,"已分配" ), BUYING(2 ,"正在采购" ), FINISH(3 ,"已完成" ), HASEERR(4 ,"采购失败" ); private int code; private String msg; PurchaseDetailStatusEnum(int code, String msg) { this .code = code; this .msg = msg; } public int getCode () { return code; } public String getMsg () { return msg; } } }
3.controller层com.atguigu.gulimall.ware.controller.PurchaseController
@RequestMapping("merge") public R merge (@RequestBody MergeVo mergeVo) { purchaseService.mergePurchase(mergeVo); return R.ok(); }
4.service层com.atguigu.gulimall.ware.service.impl.PurchaseServiceImpl
@Transactional @Override public void mergePurchase (MergeVo mergeVo) { Long purchaseId = mergeVo.getPurchaseId(); if (purchaseId == null ){ PurchaseEntity purchaseEntity = new PurchaseEntity (); purchaseEntity.setStatus(WareConstant.PurchaseStatusEnum.CREATED.getCode()); purchaseEntity.setCreateTime(new Date ()); purchaseEntity.setUpdateTime(new Date ()); this .save(purchaseEntity); purchaseId = purchaseEntity.getId(); } List<Long> items = mergeVo.getItems(); Long finalPurchaseId = purchaseId; List<PurchaseDetailEntity> collect = items.stream().map(i -> { PurchaseDetailEntity detailEntity = new PurchaseDetailEntity (); detailEntity.setPurchaseId(finalPurchaseId); detailEntity.setStatus(WareConstant.PurchaseDetailStatusEnum.ASSIGNED.getCode()); detailEntity.setId(i); return detailEntity; }).collect(Collectors.toList()); purchaseDetailService.updateBatchById(collect); PurchaseEntity purchaseEntity = new PurchaseEntity (); purchaseEntity.setId(purchaseId); purchaseEntity.setUpdateTime(new Date ()); this .updateById(purchaseEntity); }
5.测试
两个采购需求
如果不选择采购单id就会新建采购单
jackson: date-format: yyyy-MM-dd HH:mm:ss
1.4采购人员领取采购单 POST
/ware/purchase/received
请求参数
分页数据
响应数据 { "msg": "success", "code": 0 }